
There is something so special and beautiful about a homemade pie crust. I have perfected the BEST and most SIMPLE flaky pie crust recipe that is fool proof every time and can be used for any sweet pie recipe you desire!
I know I am not the only one who felt this, but there was always something about pie crust that intimidated me. I don't know what it was but I thought for sure making a homemade pie crust was something I couldn't do or couldn't do right. I thought I didn't have the right tools and I thought for sure it was super hard and would take forever. But there is something about a fresh homemade pie that feels like nothing else. It just feels so homie, so loving, and warm. I love homemade pies so I made it my mission to learn and perfect the easiest flaky pie crust recipe. And I learned that it is actually not scary at all! It is simple, fun, and honestly not that hard once you learn all of the tricks I have below.
I like to call making pie crust an art because it truly is so beautiful. There is something about a raw pie crust that is just so elegant. I can't explain it but it gives me the feels! My favorite thing about it is you can play around with multiple creative artistic designs!
TIPS AND STEPS TO MAKING PIE CRUST
- Make sure your butter is cold! This helps make a flaky pie crust. Then dice it up in small pieces.
- In a large bowl combine your flour and salt and mix well. Then add your butter and shortening. Using a pastry cutter, cut in your butter until your mixture resembles the size of oats.
- If you do not have a pastry cutter you can use the flat beater attachment on your stand mixer.
- Add your egg and vinegar and mix with a spatula.
- Then add your water, one tablespoon at a time until the dough is just combined. You may not need all 5 tablespoon so be careful not to make your dough too wet. Mix with a spatula.
- Using your hands knead your dough together until just combined
- Be careful not to over mix our your dough will become tough rather than tender.
- Cut your ball of dough in half and wrap each ball up with plastic wrap.
- This recipe makes two crusts (one for the top and one for the bottom). If your recipe only needs a bottom crust you can put your second half in the freezer or use it for a more decorative edge design!
- Let your dough rest in the fridge for 4 hours to overnight. This is important because the butter needs to chill again so you have a flaky crust but also the dough needs to rest. This allows your gluten to rest which prevents shrinking in the oven and also allows for a more tender crust!
- Take your dough out and let it sit at room temperature for 15 minutes. On a floured surface roll out your dough using a floured rolling pin until your crust is about ¼ inch thick.
- Transfer your dough into your pie pan using your rolling pin. Press your crust into your pan.
- Trim off the extra edges.
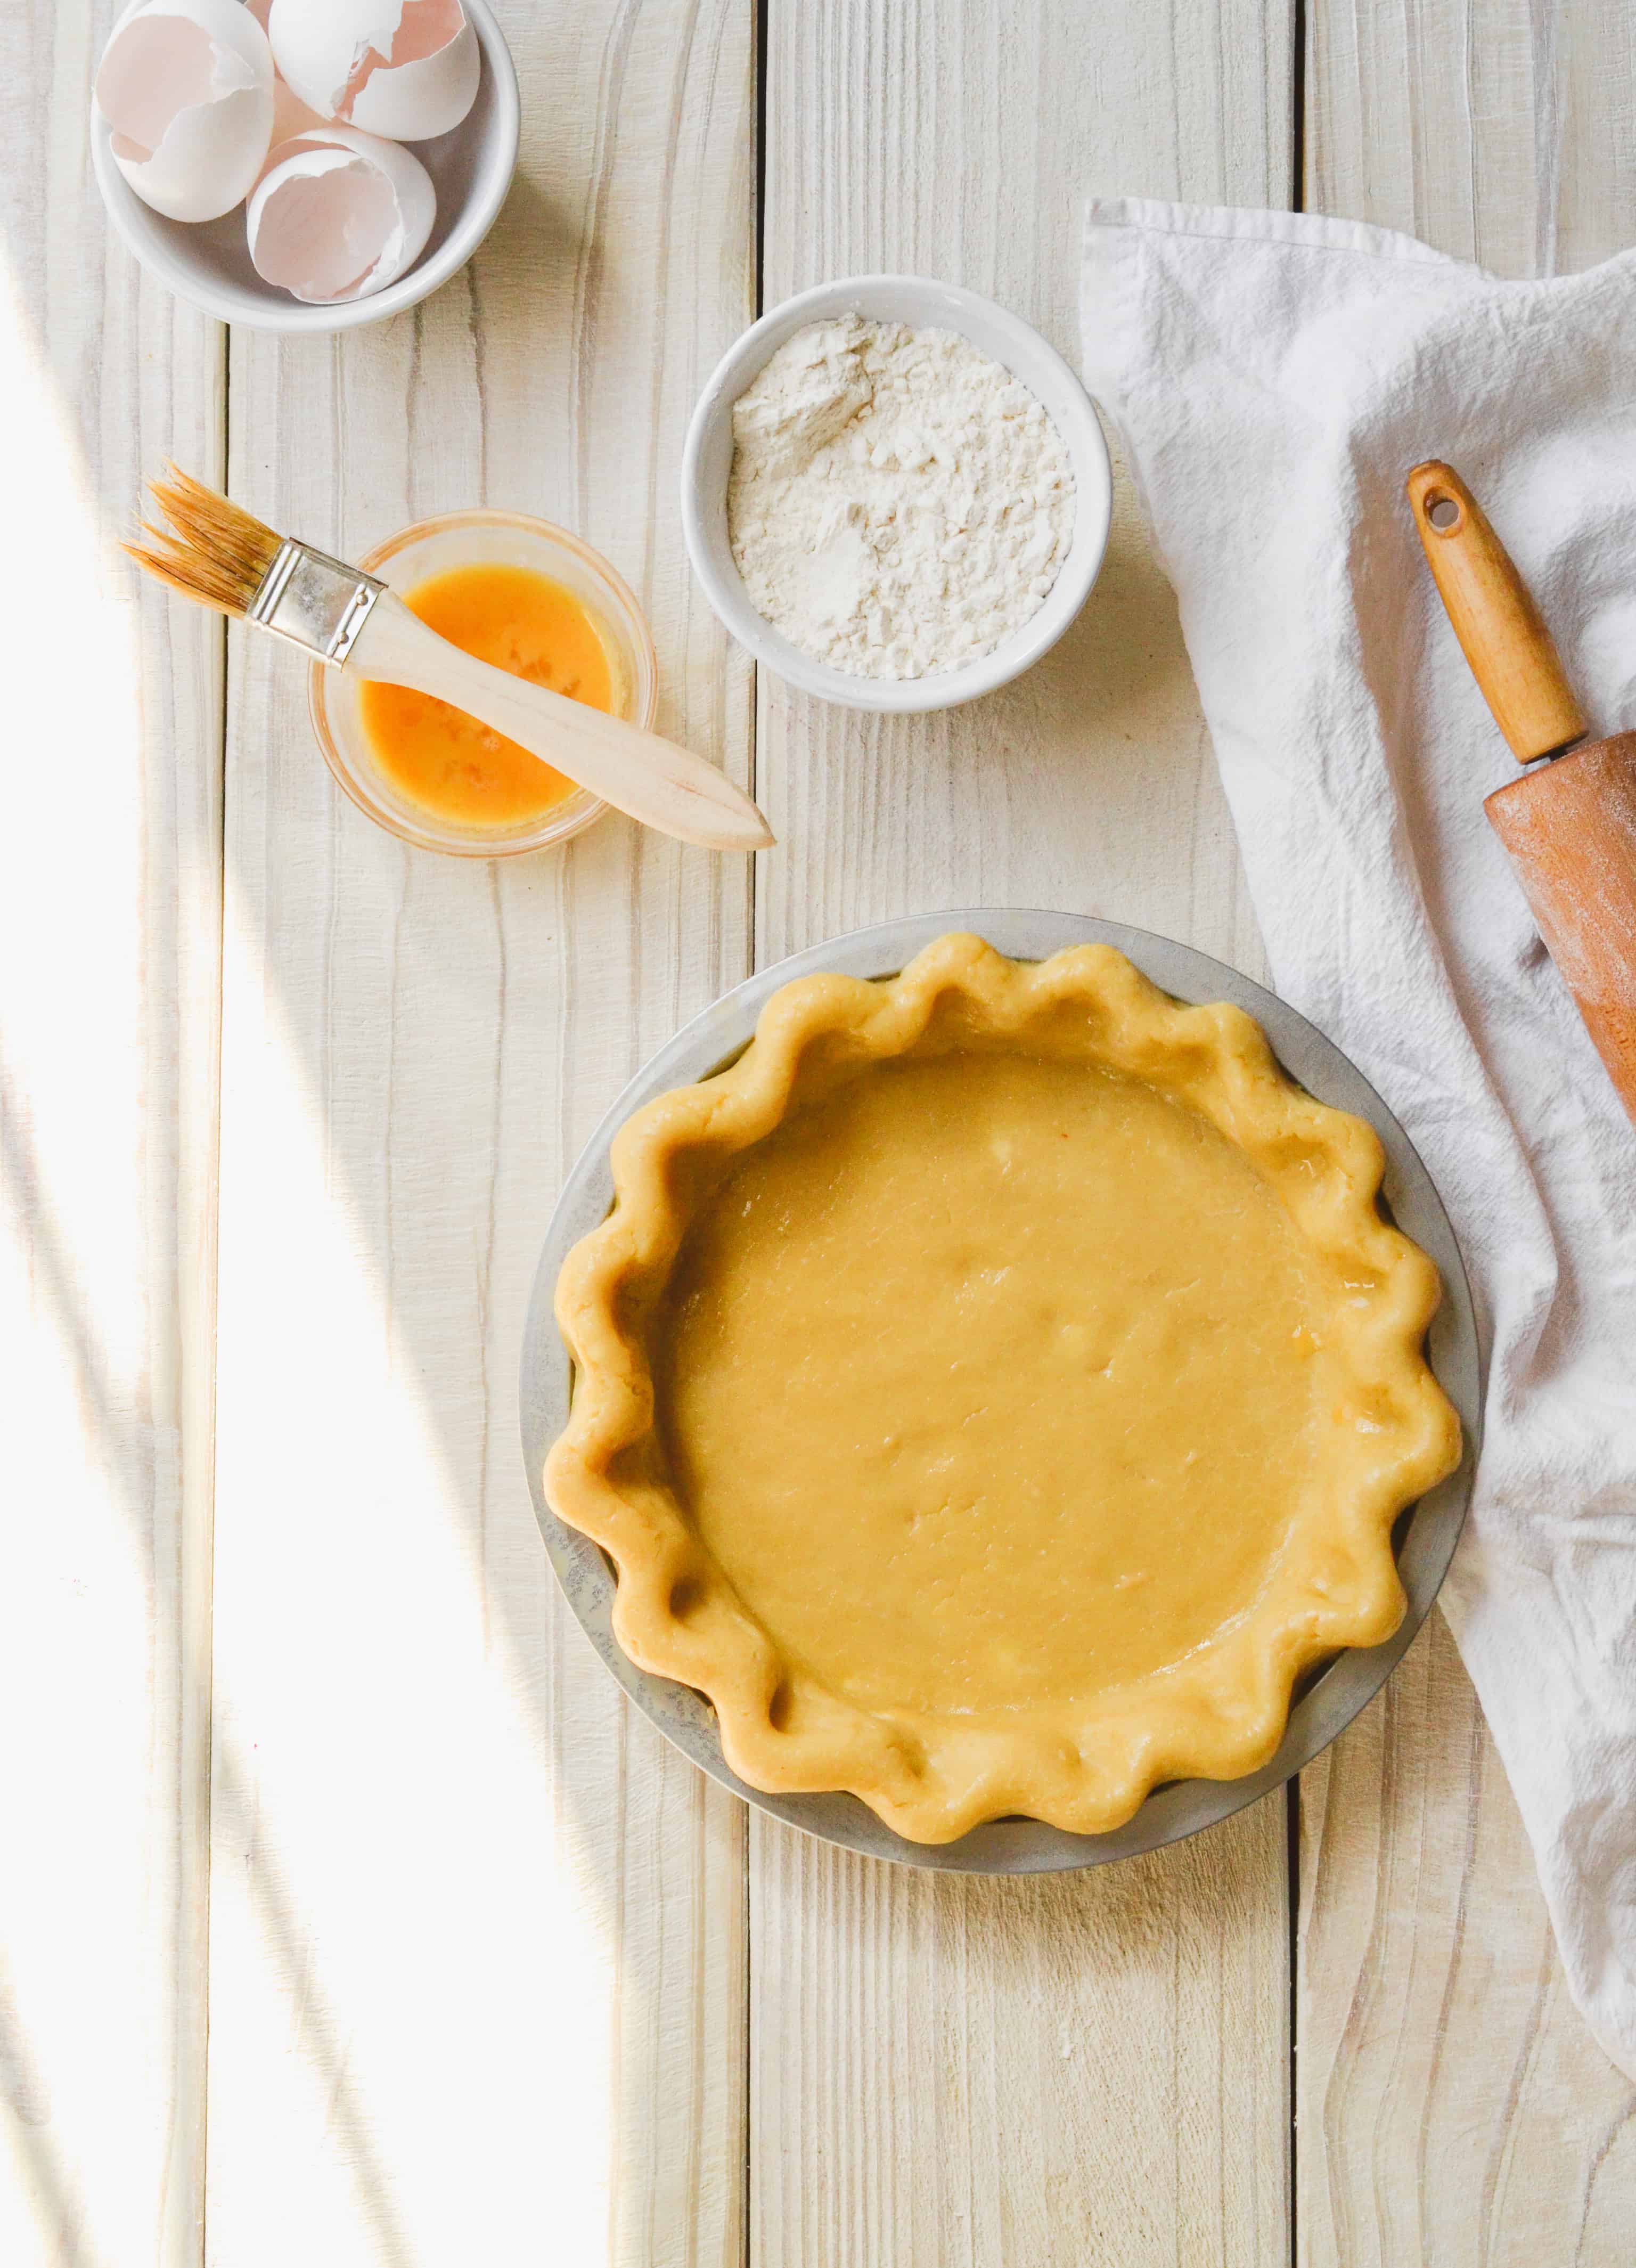
- Finish the edges and or top of your crust based on the design you chose and the individual recipe.
- Finish your edges and top crust with an egg wash (one beaten egg).
- Place your crust back in the fridge for another 15- 30 minutes (just to make sure your butter is as cold as possible).
- Bake as your recipe directs you to!
- Be sure to follow my instructions bellow if your recipe asks you to pre-bake your pie crust!
HOW TO PRE-BAKE YOUR PIE CRUST
So there are multiple kinds of pie recipes. You either need to pre-bake, semi pre-bake, or put the filling in your crust raw and bake it together. If you need to pre-bake your pie crust, it may be because your filling does not need to be baked or baked for very long. If that is the case, here are a few extra steps.
- After your bottom crust is in your pan and edges are finished, use a fork to poke some holes in the bottom of your crust to prevent your crust from puffing up.
- Then place a piece of parchment paper, pressed on top of the bottom of your crust.
- Make sure to then fill your crust with pie weights. If you do not have pie weights, fill your crust with rice or oats. This helps your crust from not falling down the sides or shrinking.
- Bake your crust at 350 degrees for 25 minutes. Then take out your parchment paper/weights, and continue to bake for 35 minutes (if you are fully pre-baking your crust). Time may vary for a semi pre-bake (follow individual recipe).
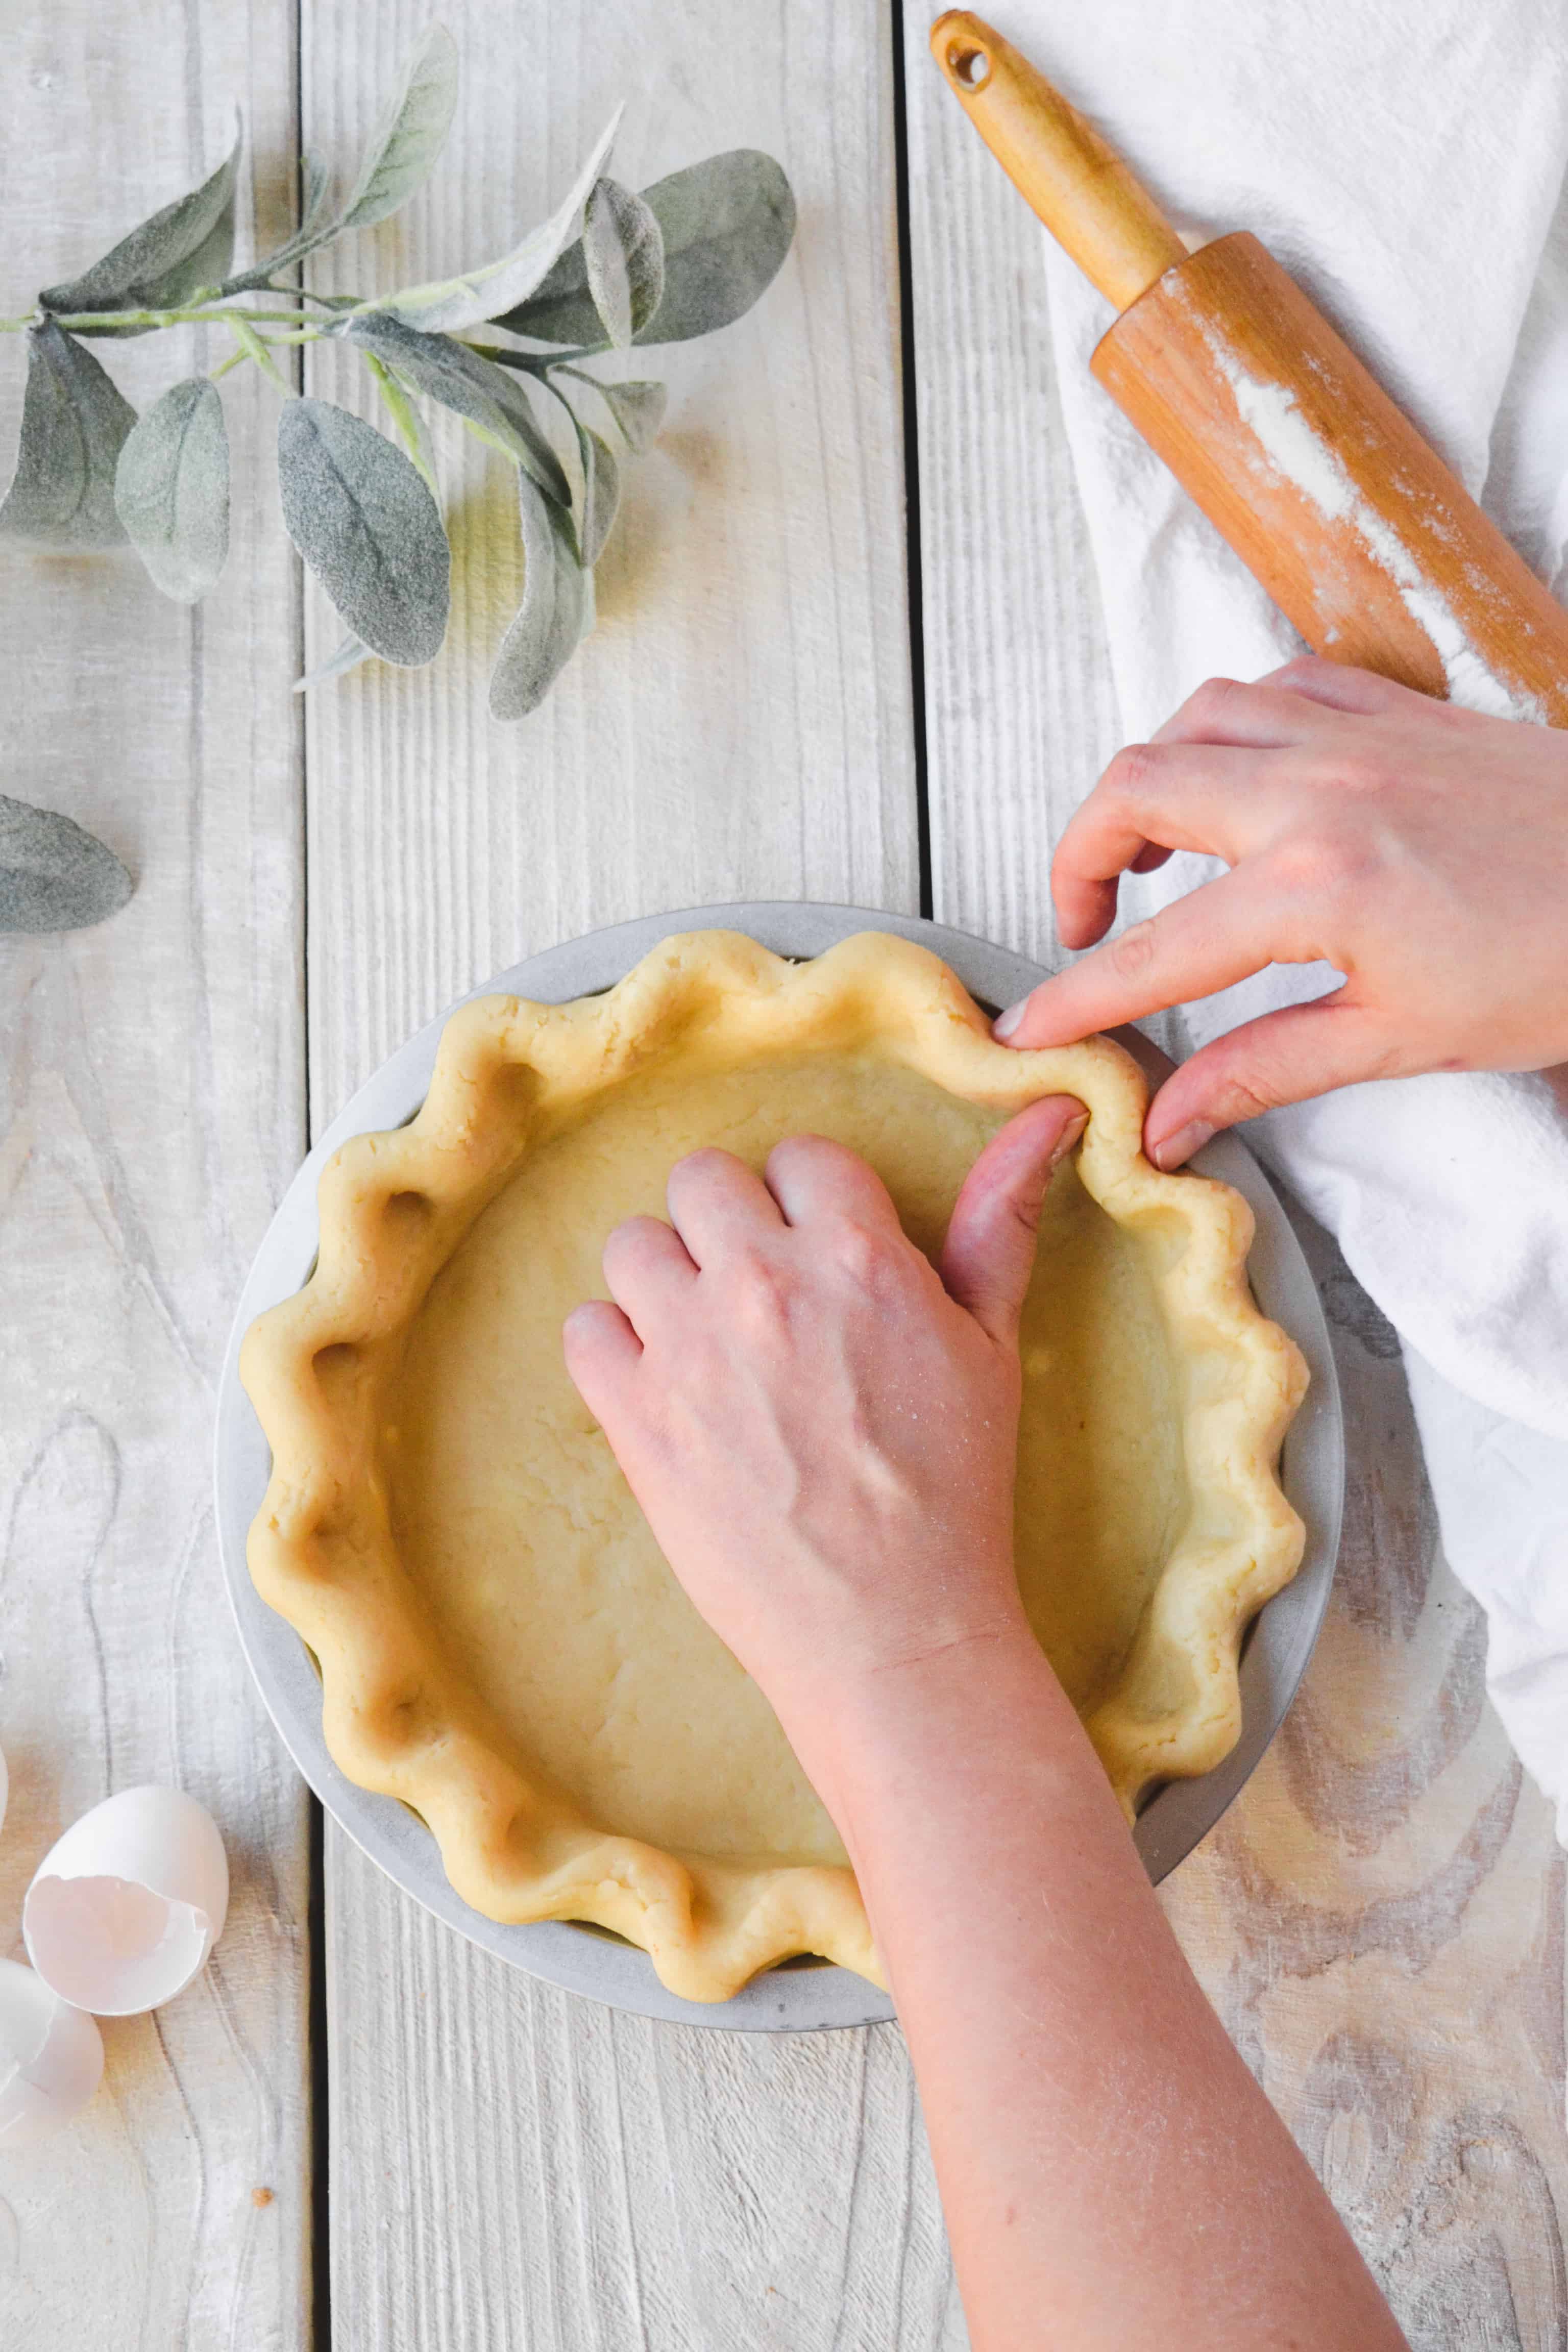
HOW TO CREATE A SIMPLE CRIMP PIE CRUST EDGE
Honestly I have done a lot of fancy fun pie crust designs but to be honest my favorite is the most simple... the classic crimp edge. It is so beautiful in its simplicity. I am going to tell you the steps to making this design but if you are looking for more pie crust designs, check out my post on pie crust designs.
- When doing this design you may want to divide your ball of dough a little unevenly. Use the bigger half so you have some extra edges to make this design.
- When trimming your edges off the crust, leave about 1 inch of hang over.
- Then tuck in the edge underneath.
- Using your thumb on one hand and the thumb and pointer finger on the other hand, crimp your edges while moving smoothly around your crust
- Watch video below to follow along!
Lastly, if you try out this flaky pie crust recipe, be sure to leave a comment/rating on how they turned out. I love hearing from you guys and will try my best to reply to every comment! And don’t forget to tag me on Instagram!
Pie Crust
Ingredients
- 3 cups flour
- 1 teaspoon salt
- ¾ cup vegtable shortening
- ¾ cup salted butter (cold and diced up)
- 1 egg will need an additional egg for an egg wash at the end. two eggs total.
- 1 tablespoon white vinegar
- 3-5 tablespoon cold water
Instructions
- In a large bowl combine your flour and salt. Using a pastry cutter, cut in your diced up cold butter and vegetable shortening until your butter flour mixture is the size of oats.
- Add your one egg, vinegar, and just enough cold water until the dough combines.
- Knead your dough until just combined.
- Divide your dough in half. Wrap each half in plastic wrap. This recipe is for two crusts (top and bottom). If your recipe does not need a top crust then you can freeze the second half for another time, or use it for an extra decorative edge. I recommend when cutting in half to lean a little heavy on the bottom crust. I tend to think the bottom crust needs more dough than the top (especially if you do not have a top crust for this pie)
- Let your dough rest in the fridge for at least 4 hours to overnight.
- Take your dough out and let it rest at room temperature for 15 minutes. Roll out your dough on a floured surface and then transfer it into your pie pan. Using a fork, poke some holes in the bottom of your crust.
- Pick your pie crust design and finish the edge and/ or top of your pie. If you are doing a top crust, roll out your second half of dough to the same thickness, create your design and then transfer to the top of your pie (on top of the filling)
- Follow the individual recipe when deciding if you need to pre bake your crust or not before adding your filling.
- Brush the top and edges with an egg wash (1 beaten egg)
- Place your crust back in the fridge again for 15-30 minutes.
- If you are fully pre-baking your crust, use parchment paper and pie weights to bake your crust for 25 minutes at 350 degrees. Then take out your weights and paper and bake for another 35 minutes. (These times may vary depending on the recipe.)
- Let crust cool.
Leave a Reply