
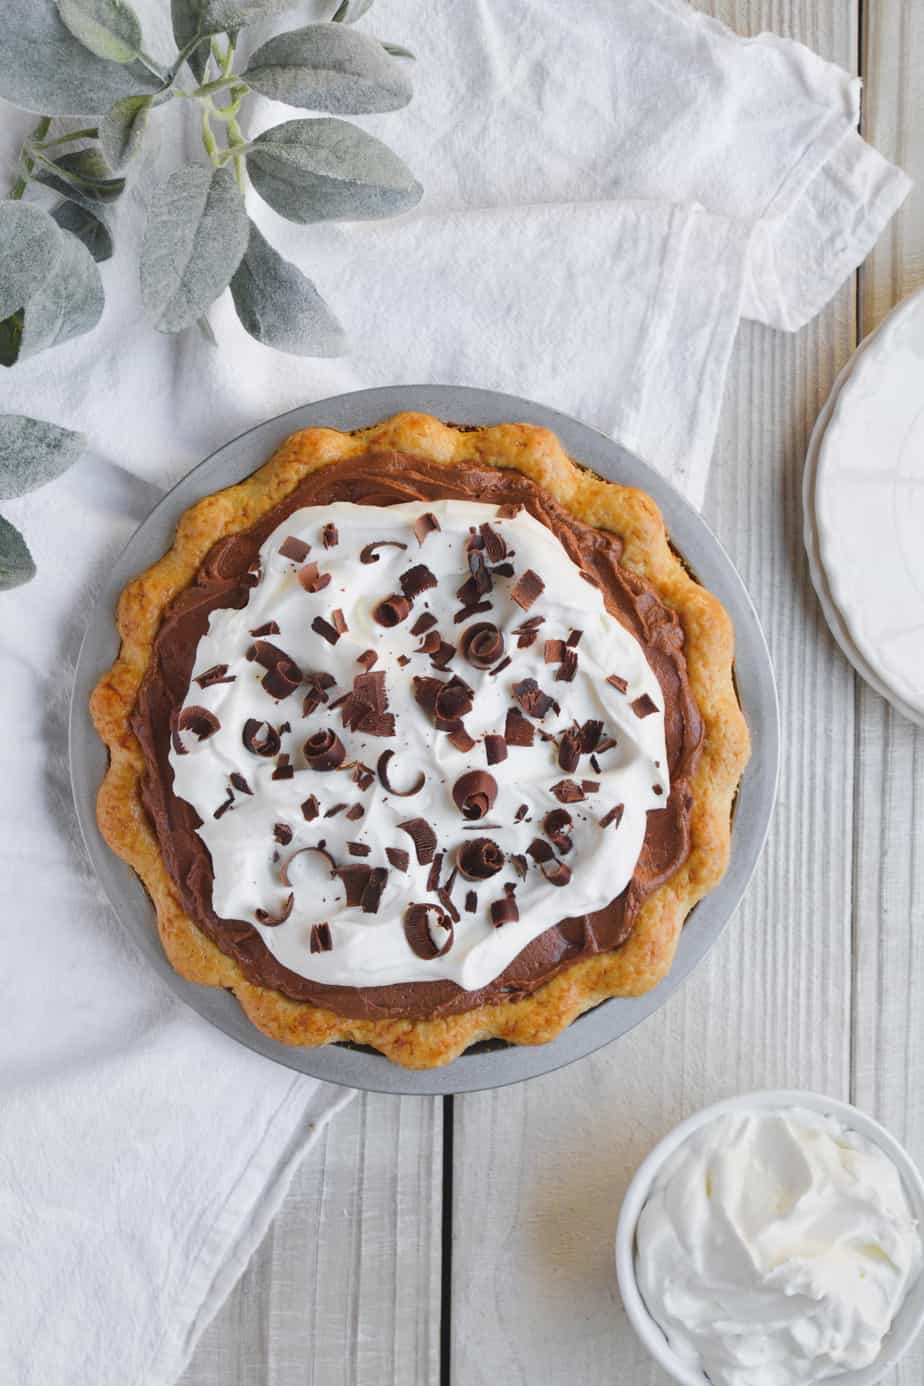
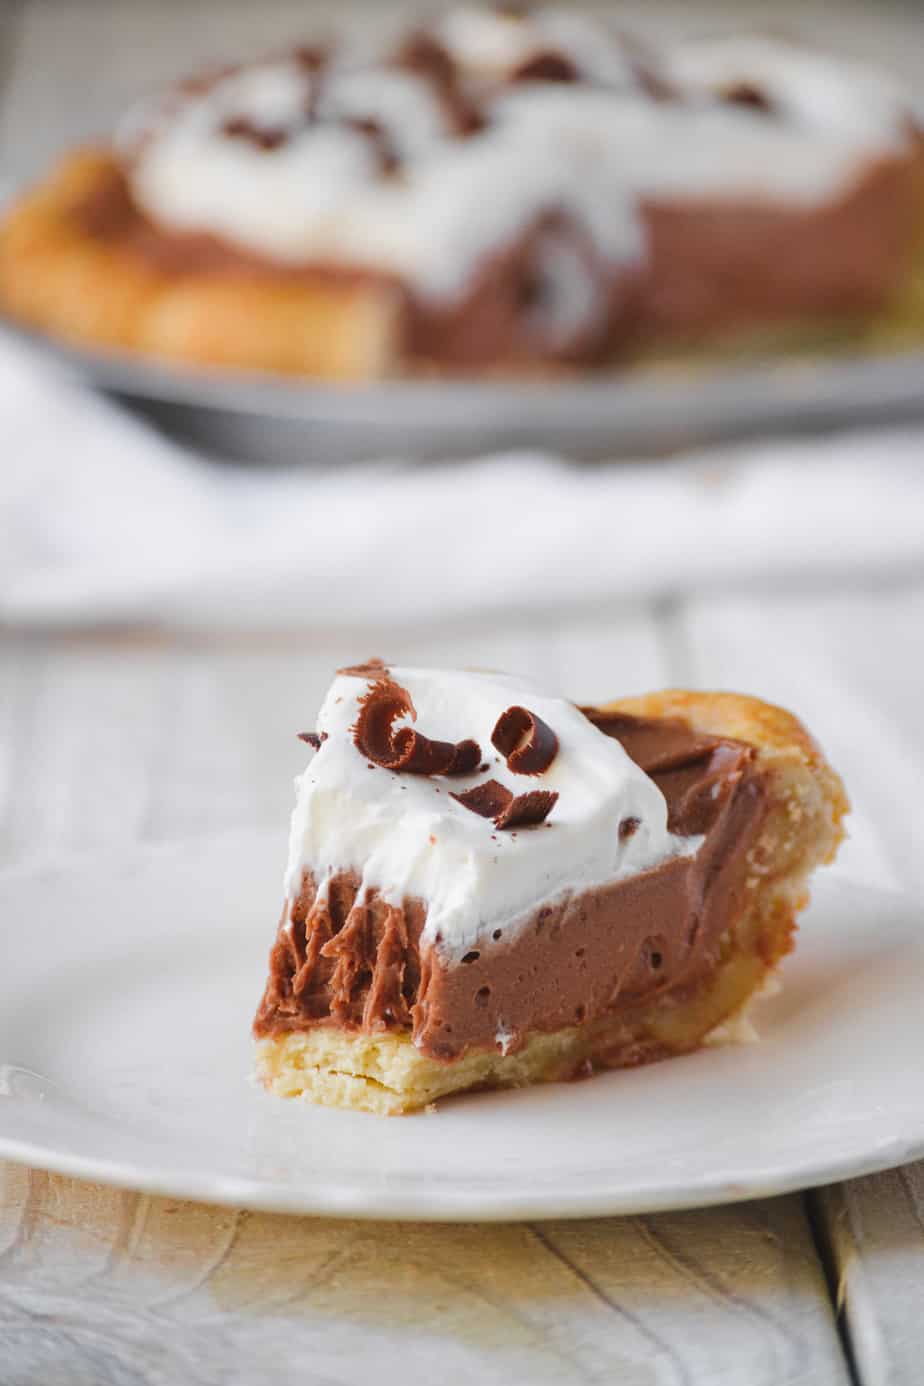
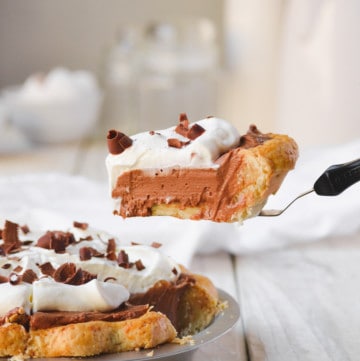
What can make a peanut butter silk pie even better?... Chocolate! This peanut butter chocolate silk pie tastes just like a Reses peanut butter cup in pie form! The buttery and flaky crust is filled with a sweet rich and indulgent chocolate and peanut butter mousse filling that is creamy and silky smooth. Top it with some whipped cream and chocolate shavings and you have one of the most beautiful pies you will ever see!
So I don't know about you but when I think about Spring I think of warm weather, birds chirping, and a freshly baked pie in the oven. So I wanted to start off Spring with one of my favorite pie recipes....and this delicious take on a French Silk Pie is it.
TIPS ON HOW TO MAKE THE PERFECT PIE CRUST
- Use butter and shortening to get a super flaky pie crust.
- The vinegar makes for a more tender crust.
- Make sure your butter is COLD. This helps for a more flaky pie crust.
- Do not over mix your dough. This will create a tough dough.... just mix until the dough is combined evenly throughout.
- Finish your crust with an egg wash for a golden color.
- Use a fork to poke holes in the bottom of your crust, so it doesn't puff up.
- Use pie weights when baking, so that your crust does not sink while baking.
HOW TO MAKE THE FILLING
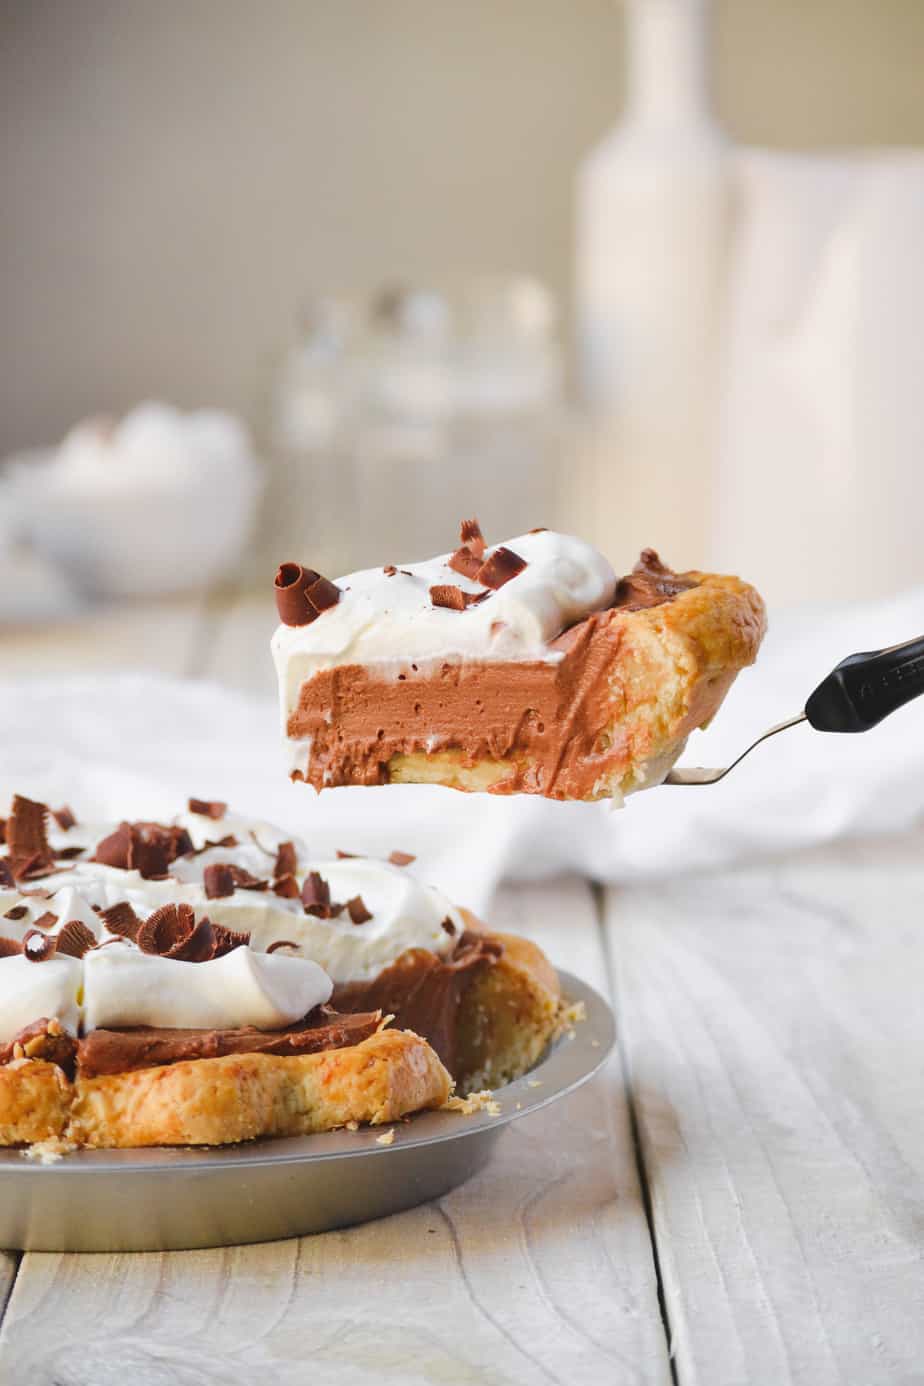
This filling for this peanut butter chocolate silk pie consists of tempered eggs with sugar, vanilla, peanut butter and butter... whipped until light and fluffy. Fold in the whipped cream and that is it... its that simple! Make sure to fold in your whipped cream and not to whisk it in, that way you keep the whipped airy texture.
HISTORY BEHIND THE FRENCH SILK PIE
So I used to think this pie was French... I mean its a little confusing, so I had to do a little research. Apparently it was created in 1951 by a woman named Betty Cooper during a Pillsbury Bake off competition. But apparently this pie only came in second place but still became an American staple. The name comes from people describing the texture of this pie as french silk. This is the perfect way to describe this pie. It is so smooth and creamy!
Lastly, if you try out this recipe, be sure to leave a comment/rating on how they turned out. I love hearing from you guys and will try my best to reply to every comment! And don’t forget to tag me on Instagram!
Chocolate Peanut Butter Silk Pie
Ingredients
Pie Crust
- 3 cups flour
- 1 teaspoon salt
- ¾ cup vegtable shortening
- ¾ cup salted butter
- 1 egg
- 1 tablespoon distilled white vinegar
- 3-5 tablespoon cold water
Filling
- 1 cup sugar
- 2 eggs
- 8 oz semisweet chocolate
- 1 teaspoon vanilla
- ½ cup salted butter
- 1 cup heavy cream
- ½ cup peanut butter
Whipped Cream
- 1 cup heavy cream
- ¼ cup powdered sugar
- shaved chocolate
Instructions
Make The Crust
- In a large bowl combine the flour and salt. Dice up the butter and shortening. Using a pastry cutter or stand mixer, cut in your butter and shortening until it is about the size of oats.
- Add the egg and vinegar and just enough water for your dough to combine.
- Mix and knead your dough until combined. Be careful not to over knead.
- Wrap your dough in plastic wrap and let it rest for 4 hours or overnight in the fridge.
- Roll out your dough until it is about ½ inch thick.
- Transfer your dough onto a pie dish and press it down into the dish.
- Trim off the extra dough around the edges.
- Tuck your edges in and then crimp them using your thumb on one hand and your thumb and index finger on the other.
- Brush your crust with an egg wash. Using a fork poke some holes in the bottom of your pie crust to keep it from puffing up.
- In your crust place parchment paper and pie weights (or rice or oats).
- Bake your crust at 350 degrees F for 15 minutes. Then take out the pie weights and parchment paper. Continue to bake your crust for another 35 minutes. At about the last 15 minutes, lightly place some aluminum foil on the top of your crust if the edges are getting too brown.
- Let cool completely.
Make Pie Filling
- In a sauce pan whisk together your eggs and sugar. Cook on low while continuously whisking, until your mixture gets pale in color and fluffy (160 degrees F).
- Remove from heat and add your chocolate, vanilla, and peanut butter.
- In a separate bowl, cream your butter then add your chocolate mixture. Beat until light and fluffy.
- In a separate bowl add your heavy cream and whisk on high until you get stiff peaks.
- Fold your whipped cream into your chocolate mixture.
- Pour your filling into your prepared pie shell.
- Refrigerate for 4 hours or more.
Whipped Cream
- In a bowl whisk together your heavy cream and powdered sugar until you reach stiff peaks.
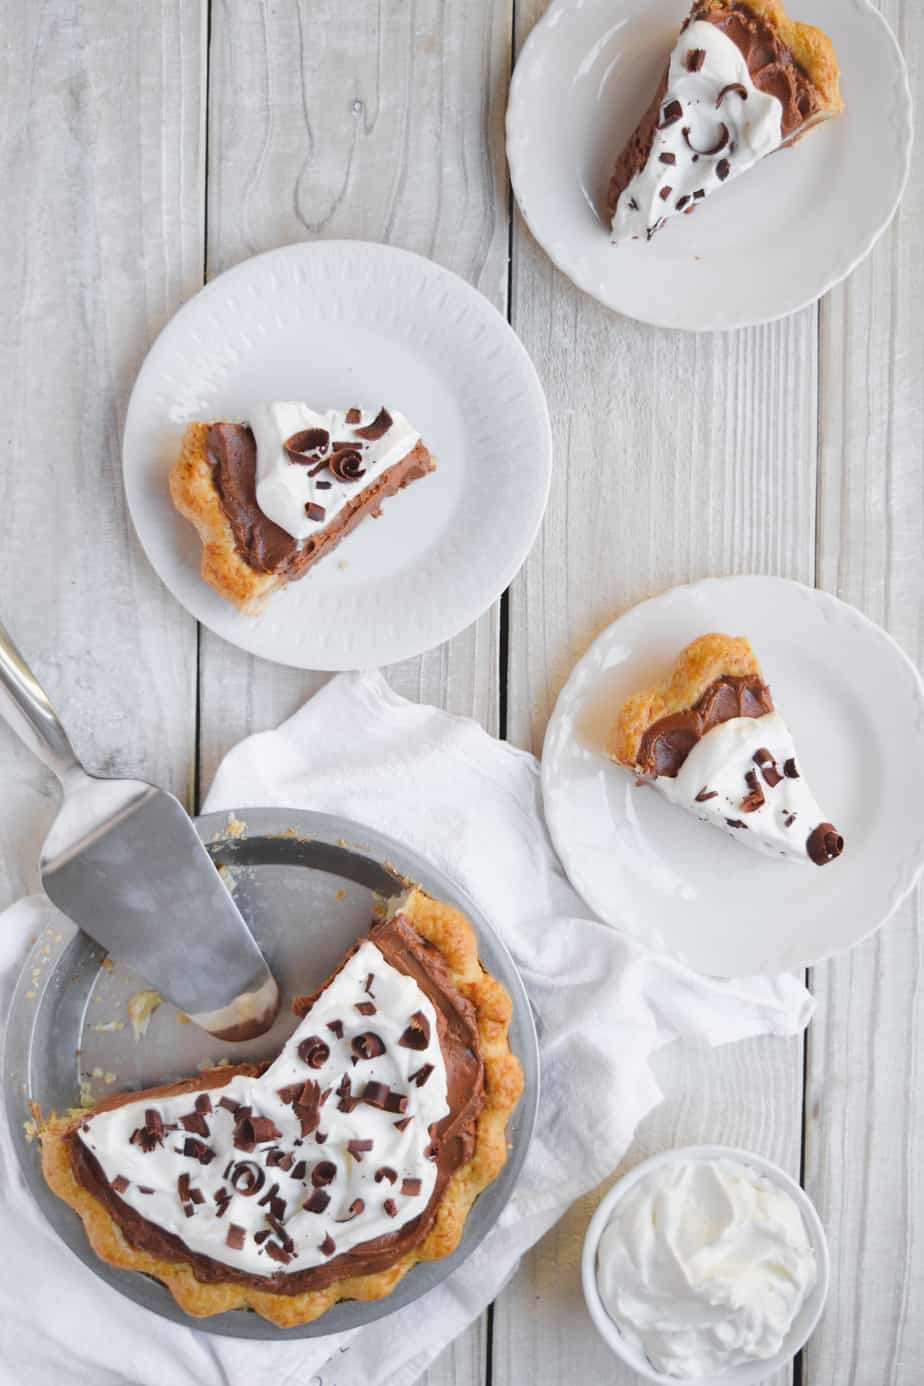
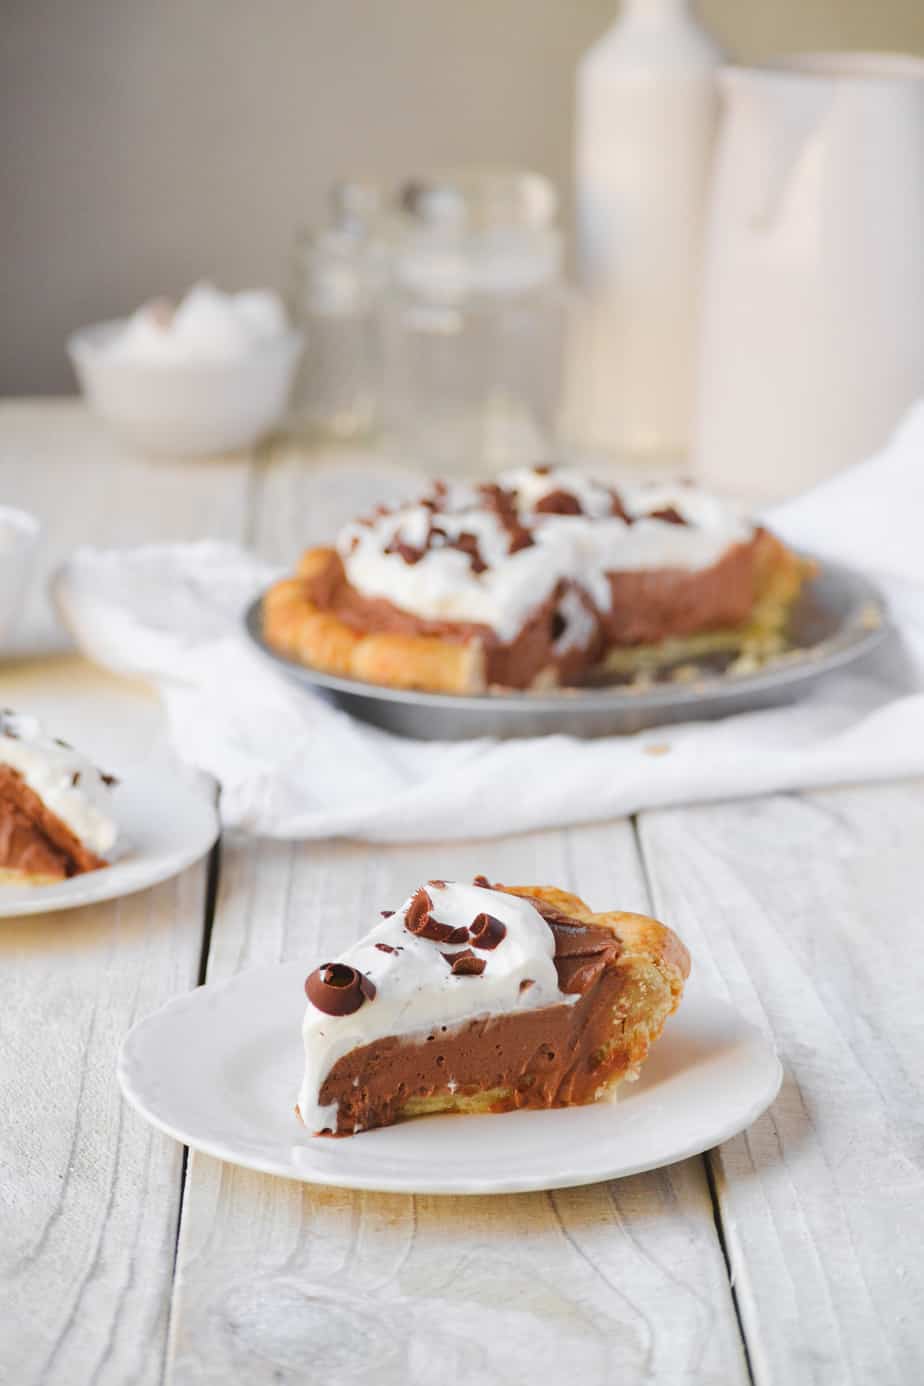
- Add your whipped cream on top of your pie and then top with some shaved chocolate.
- Serve cold and enjoy!
Sandy Thompson
I didn’t taste much of the peanut butter. Do you think if I increased the amount to 3/4 c it would be alright? Also, my pie was dense and not”silky”, any suggestions?
Thank you so much!!
Sandy
Sandy T
Hi Megan,
This pie is AMAZING!!! A friend has asked me to make 5 for his employee appreciation day!!! Can this pie be made the day before delivery?
Thank you so much!!
Sandy