
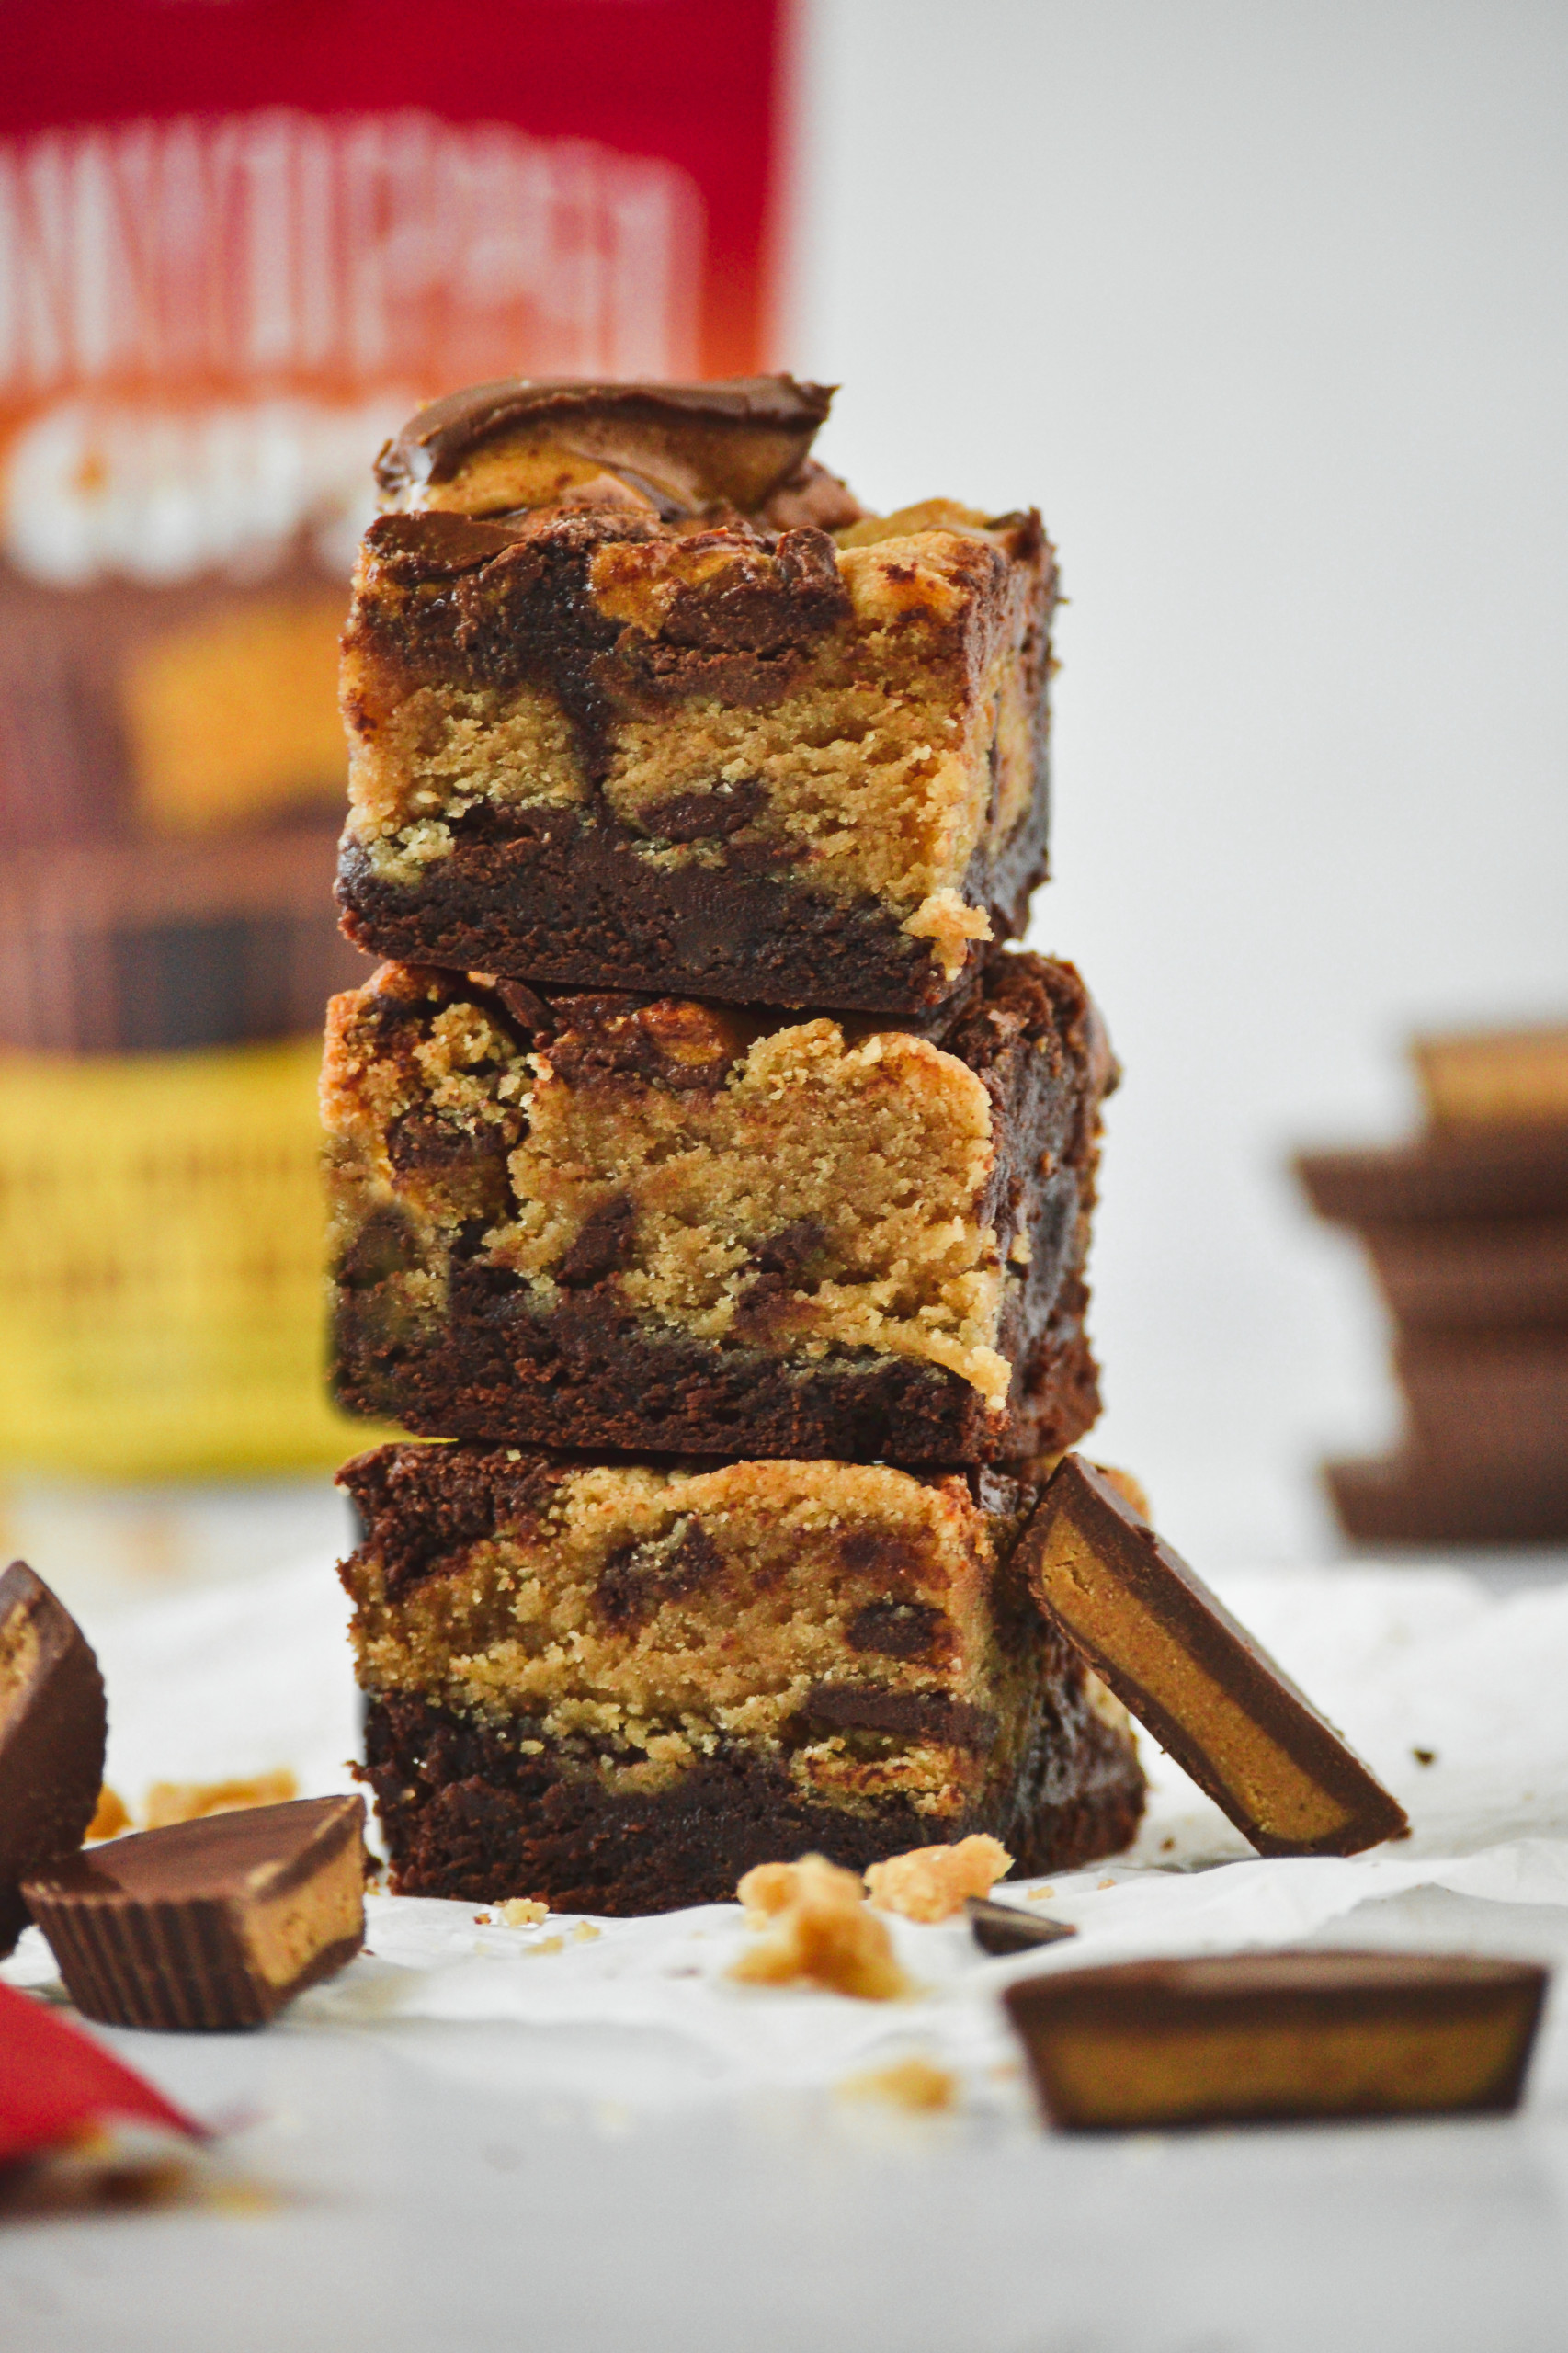
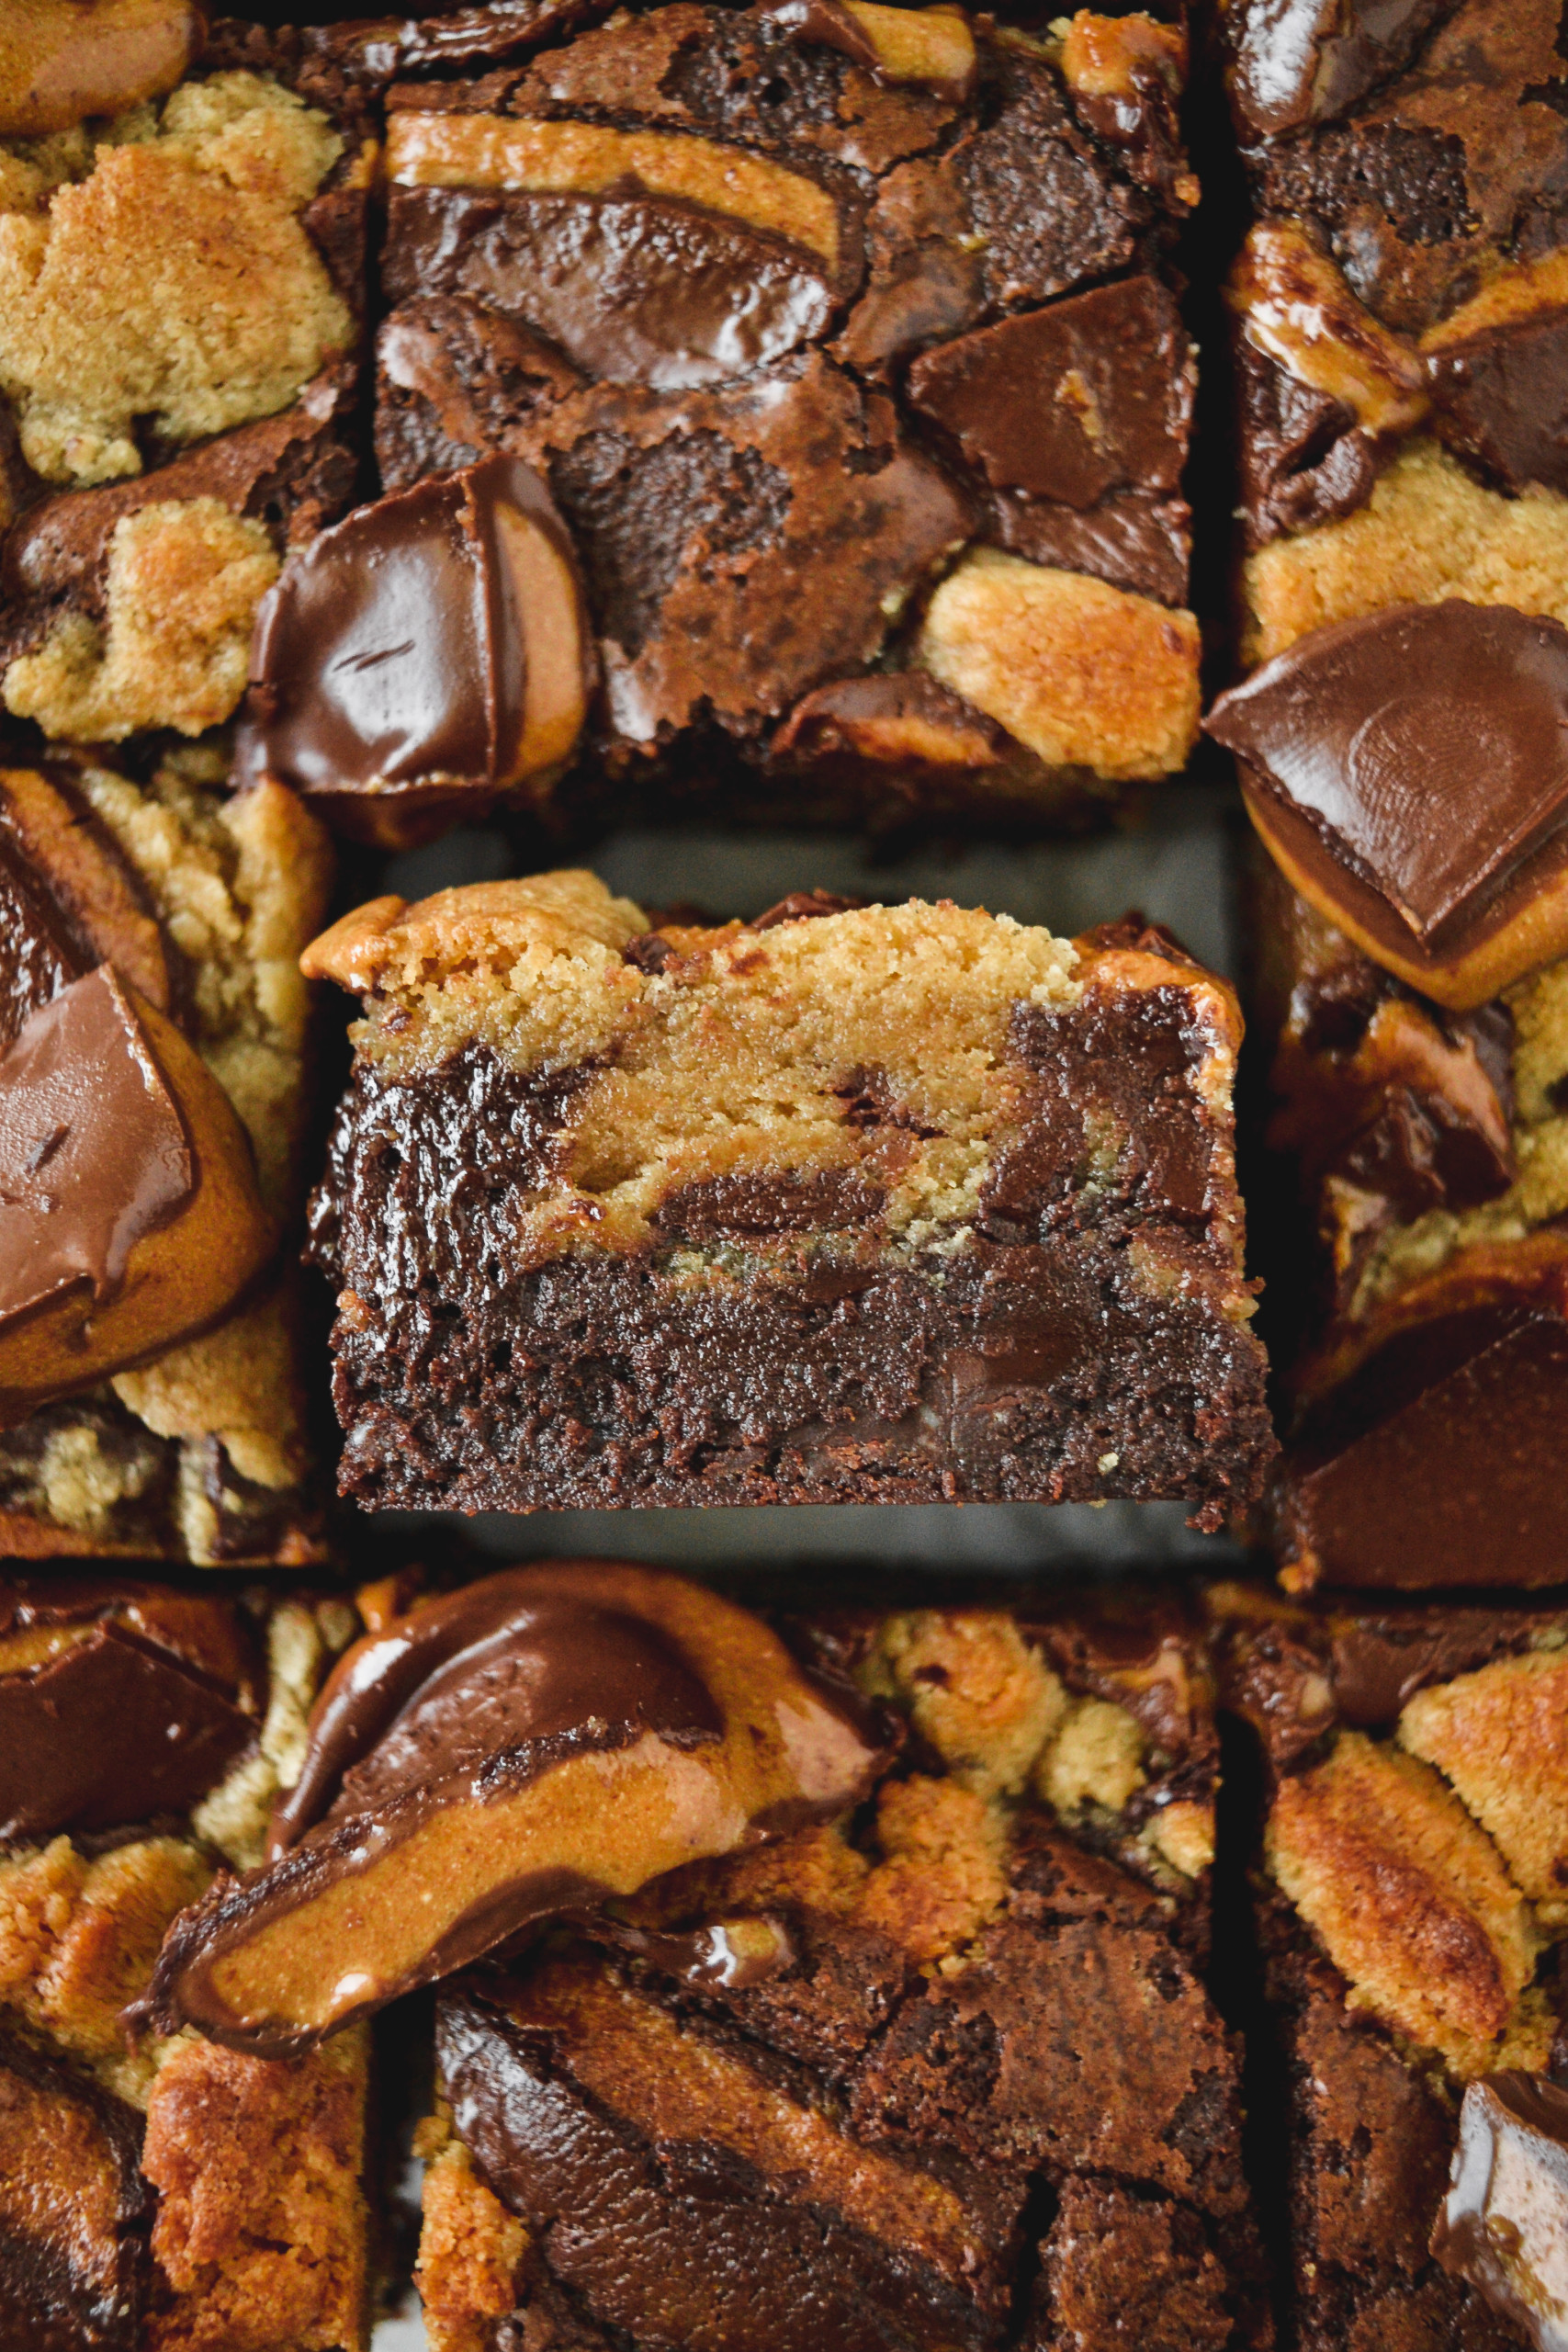
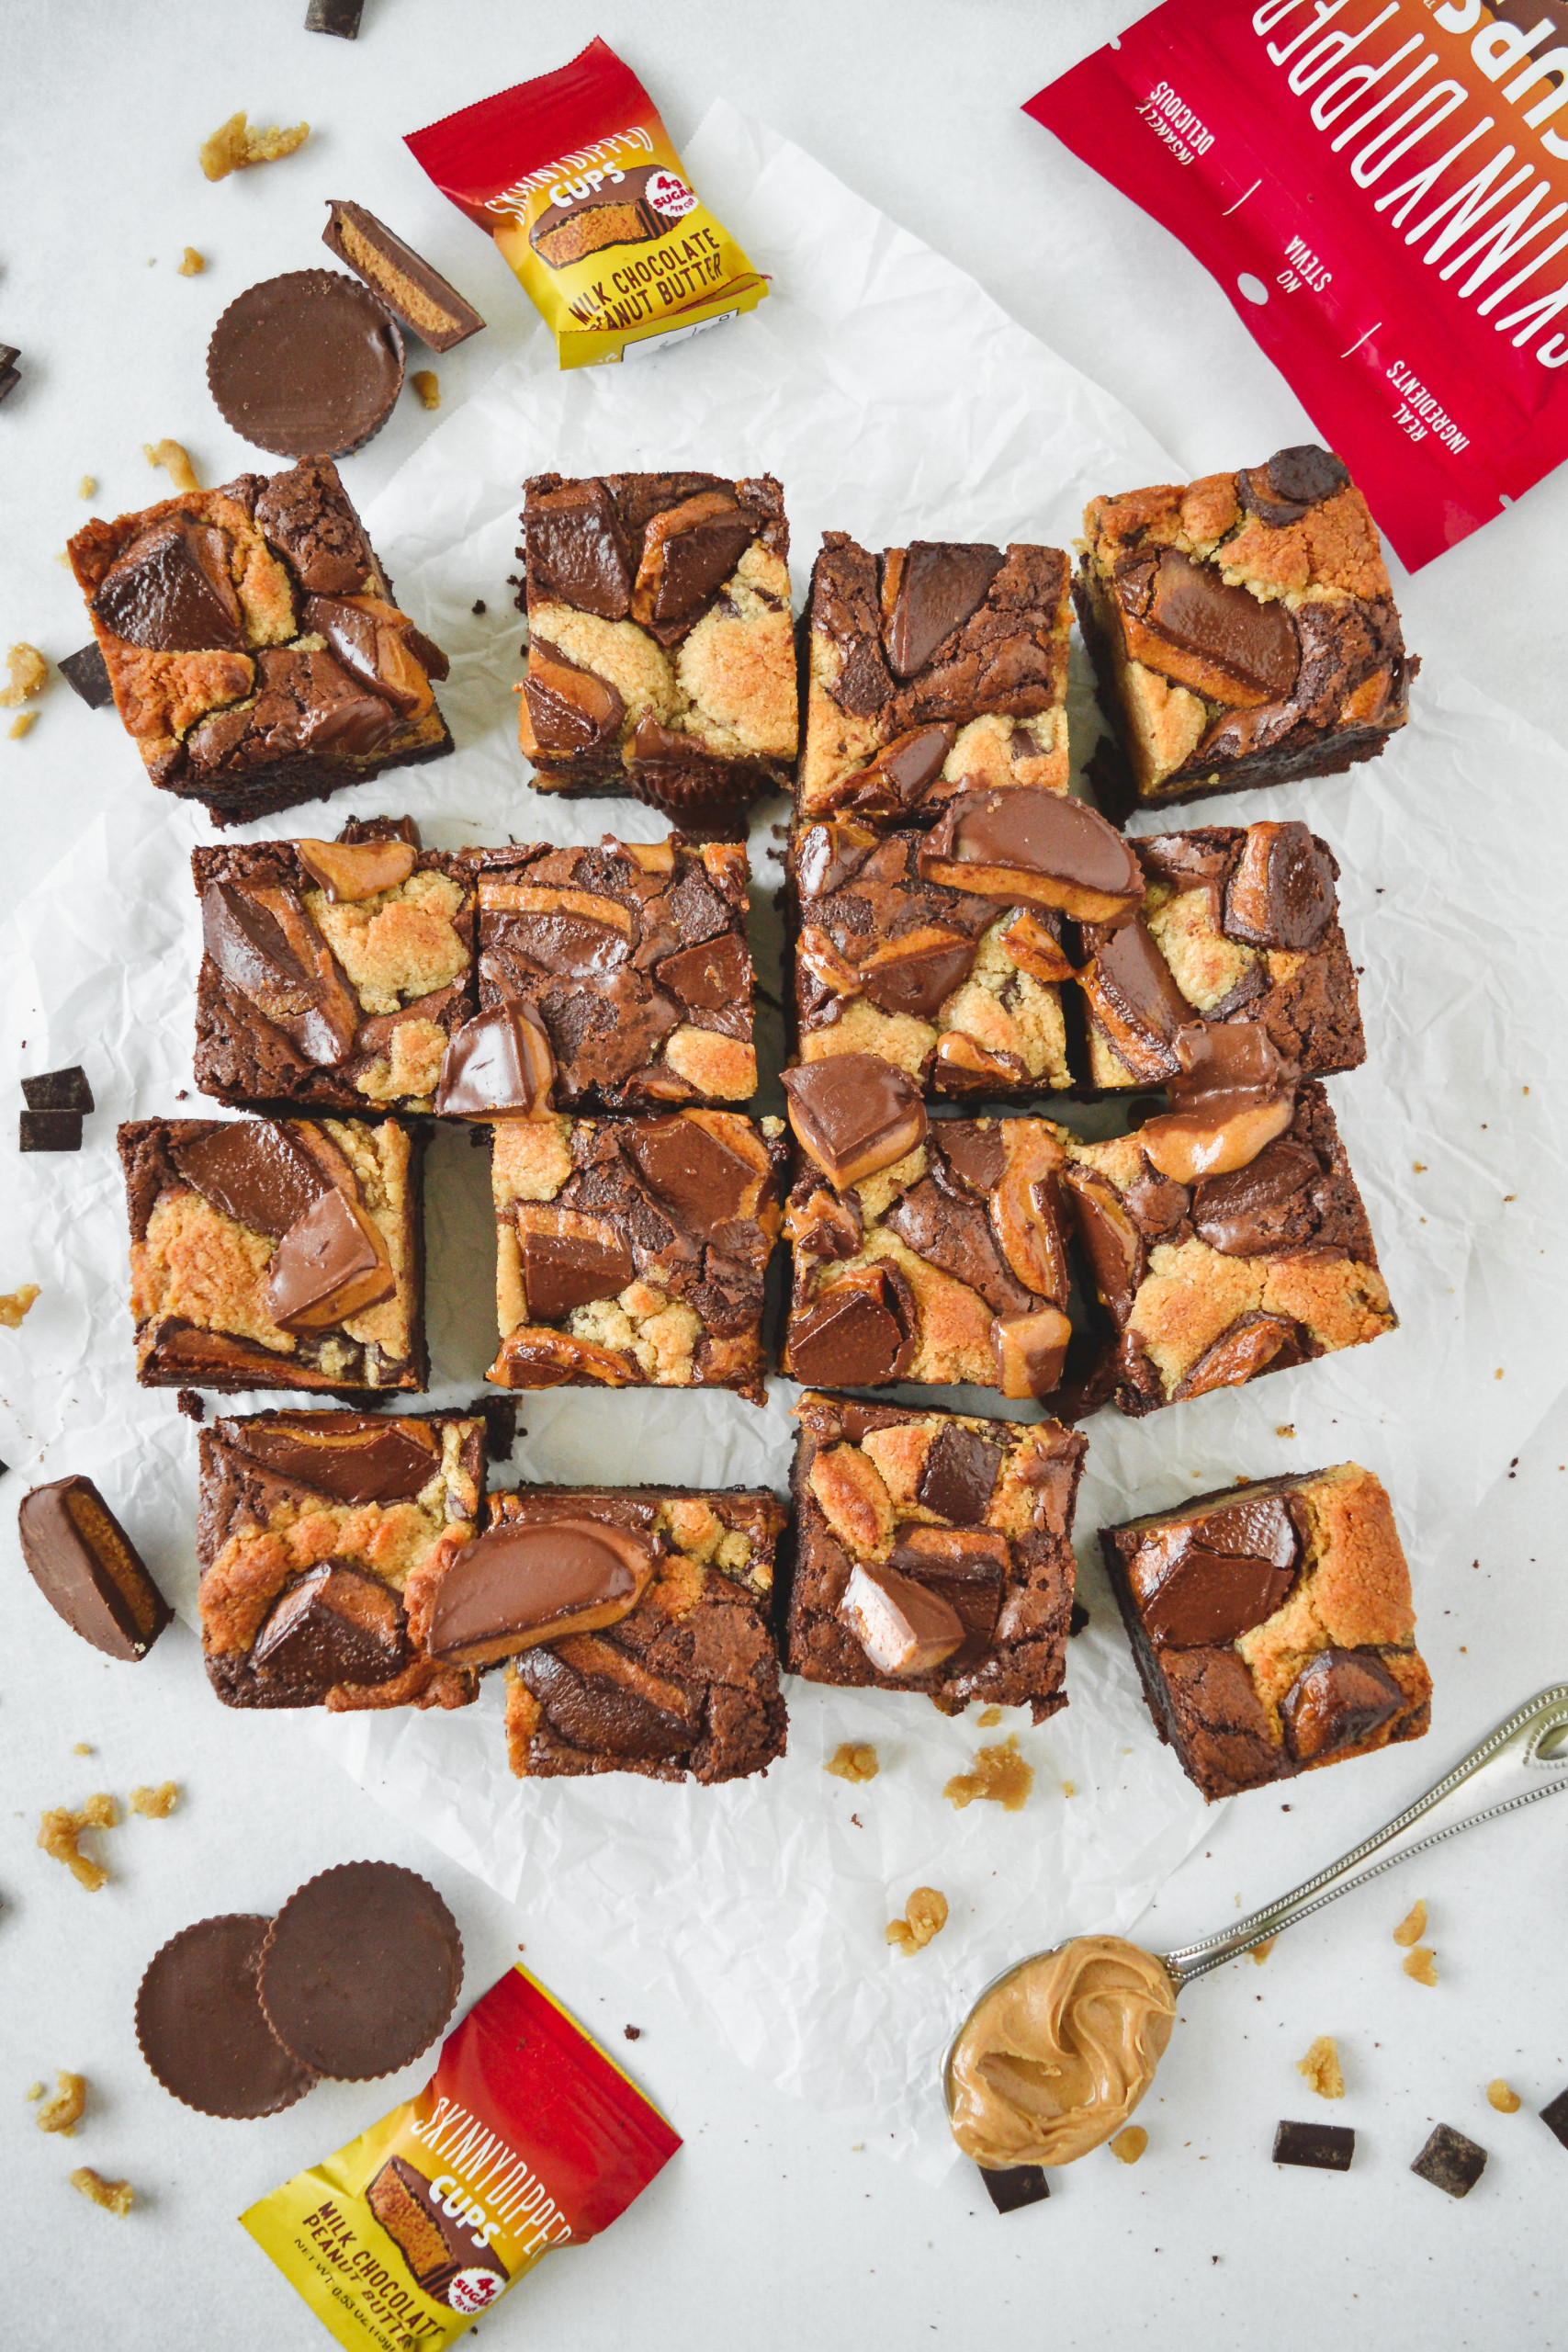
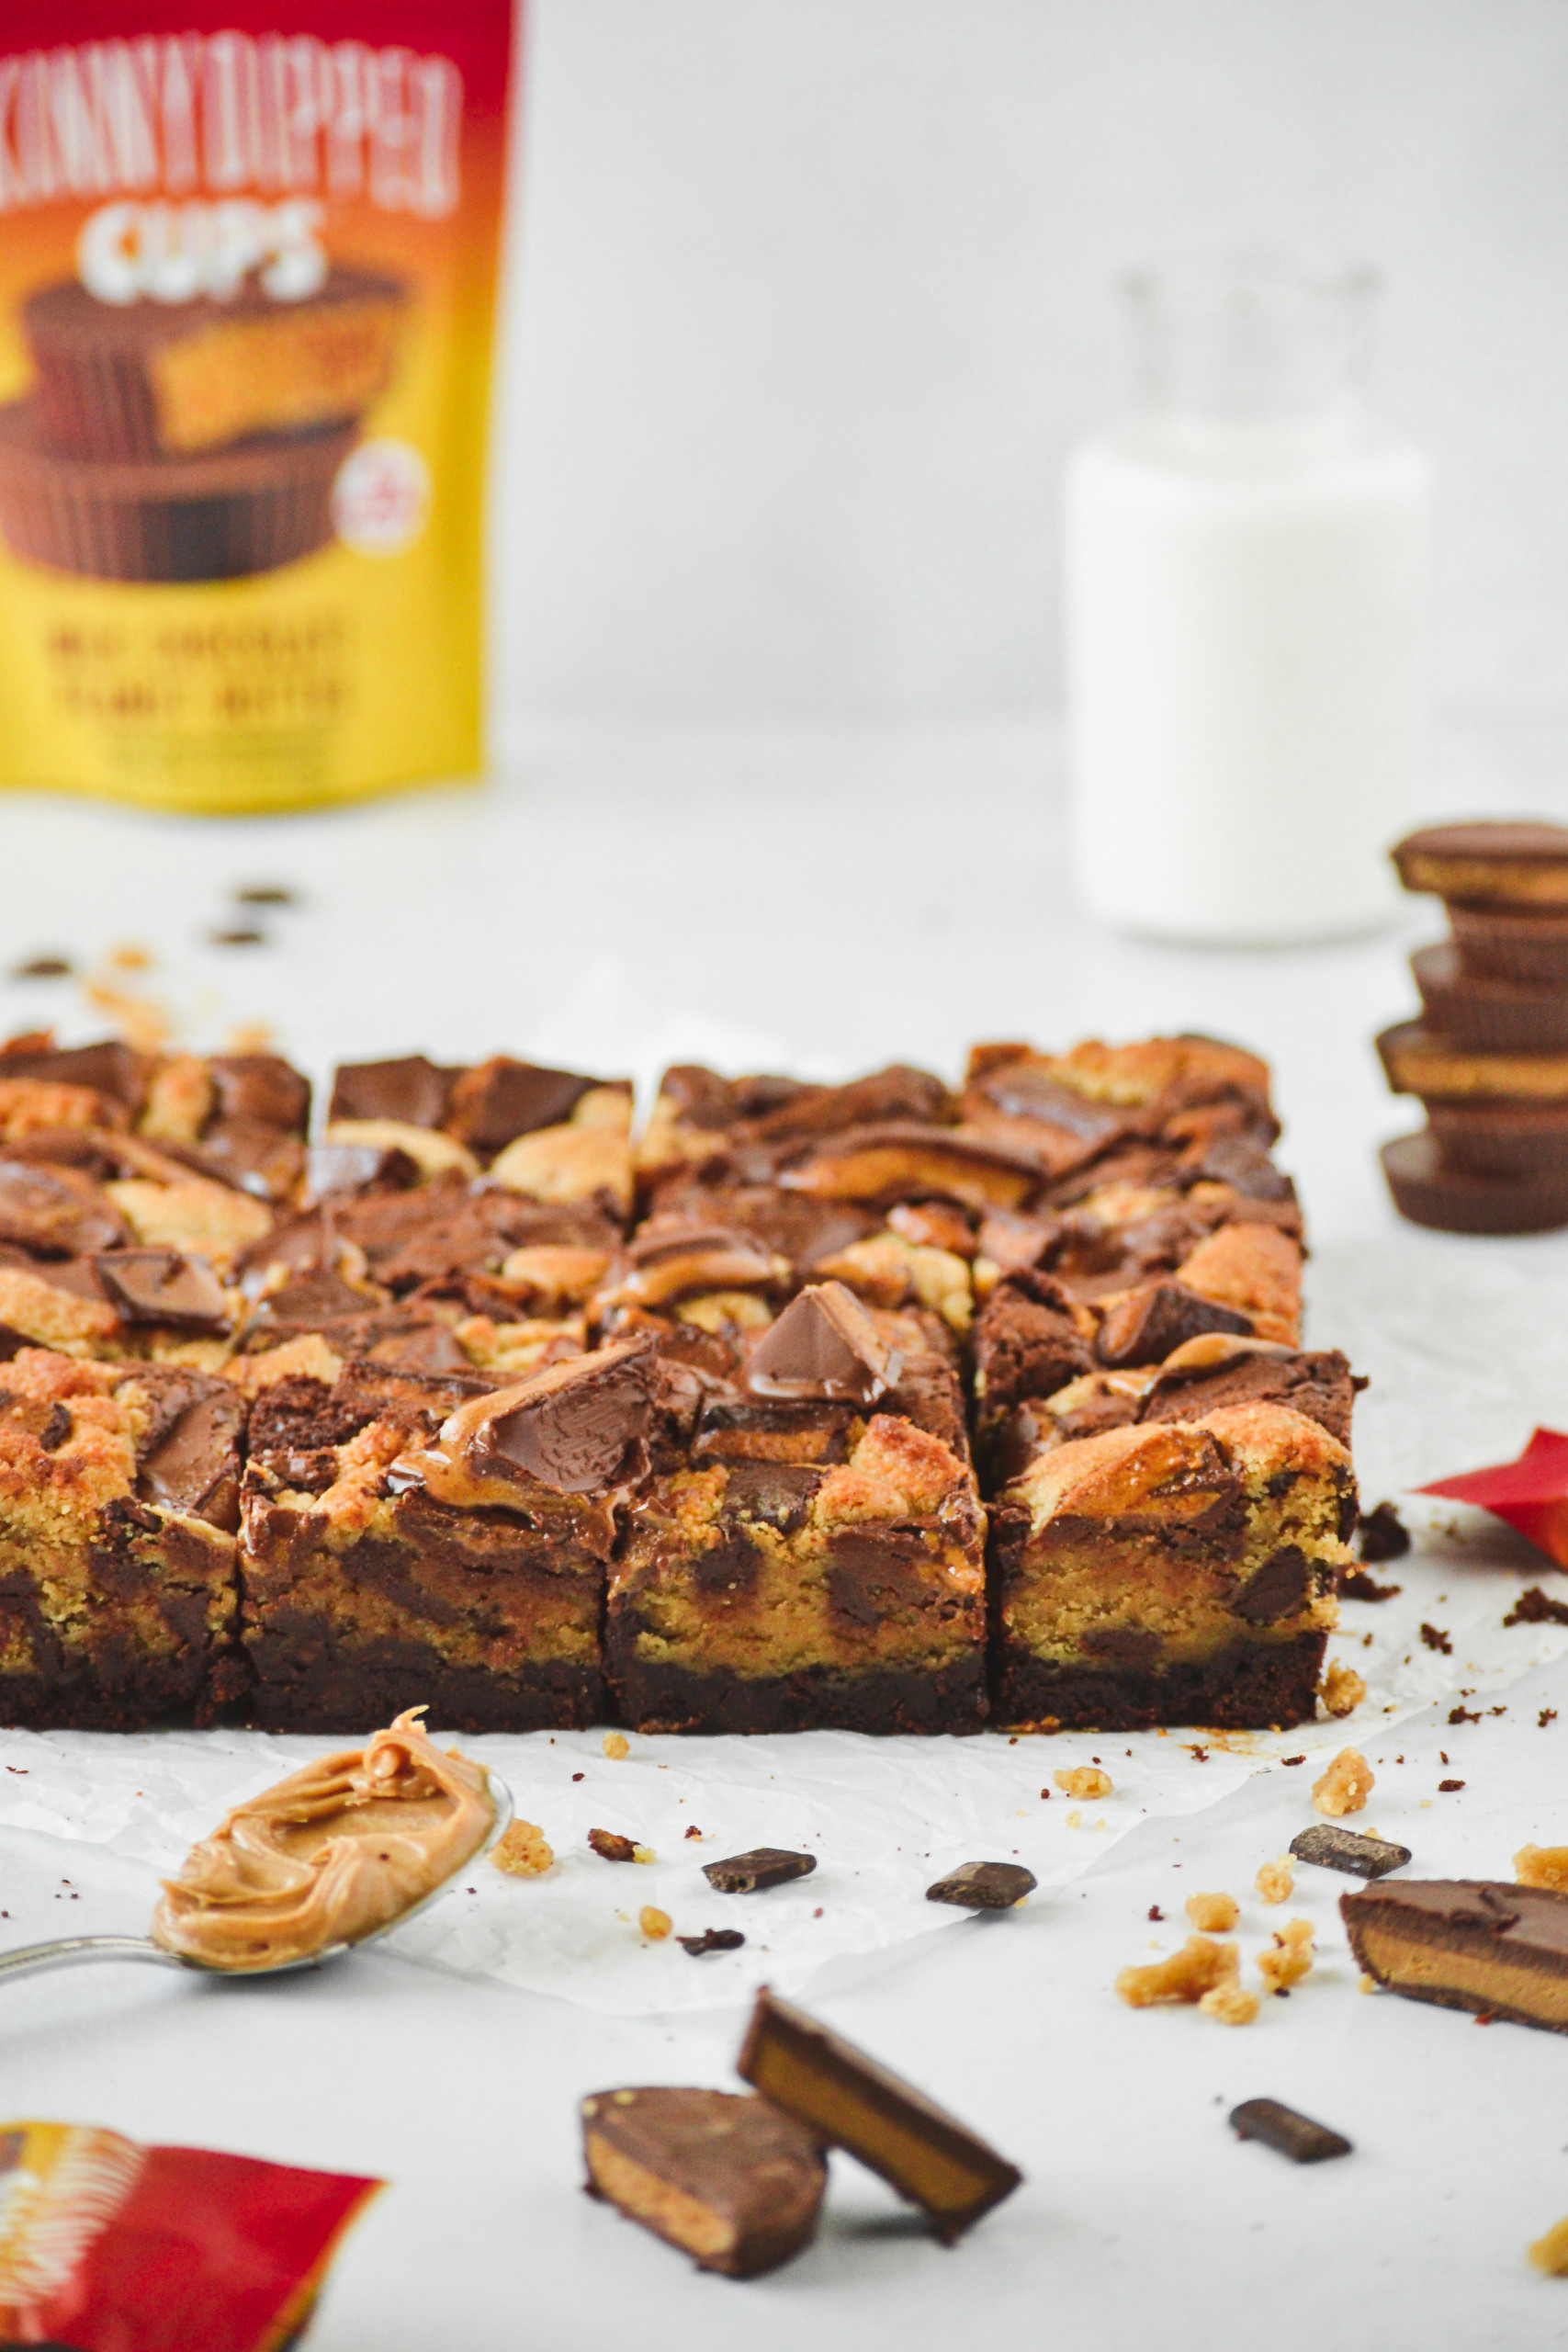
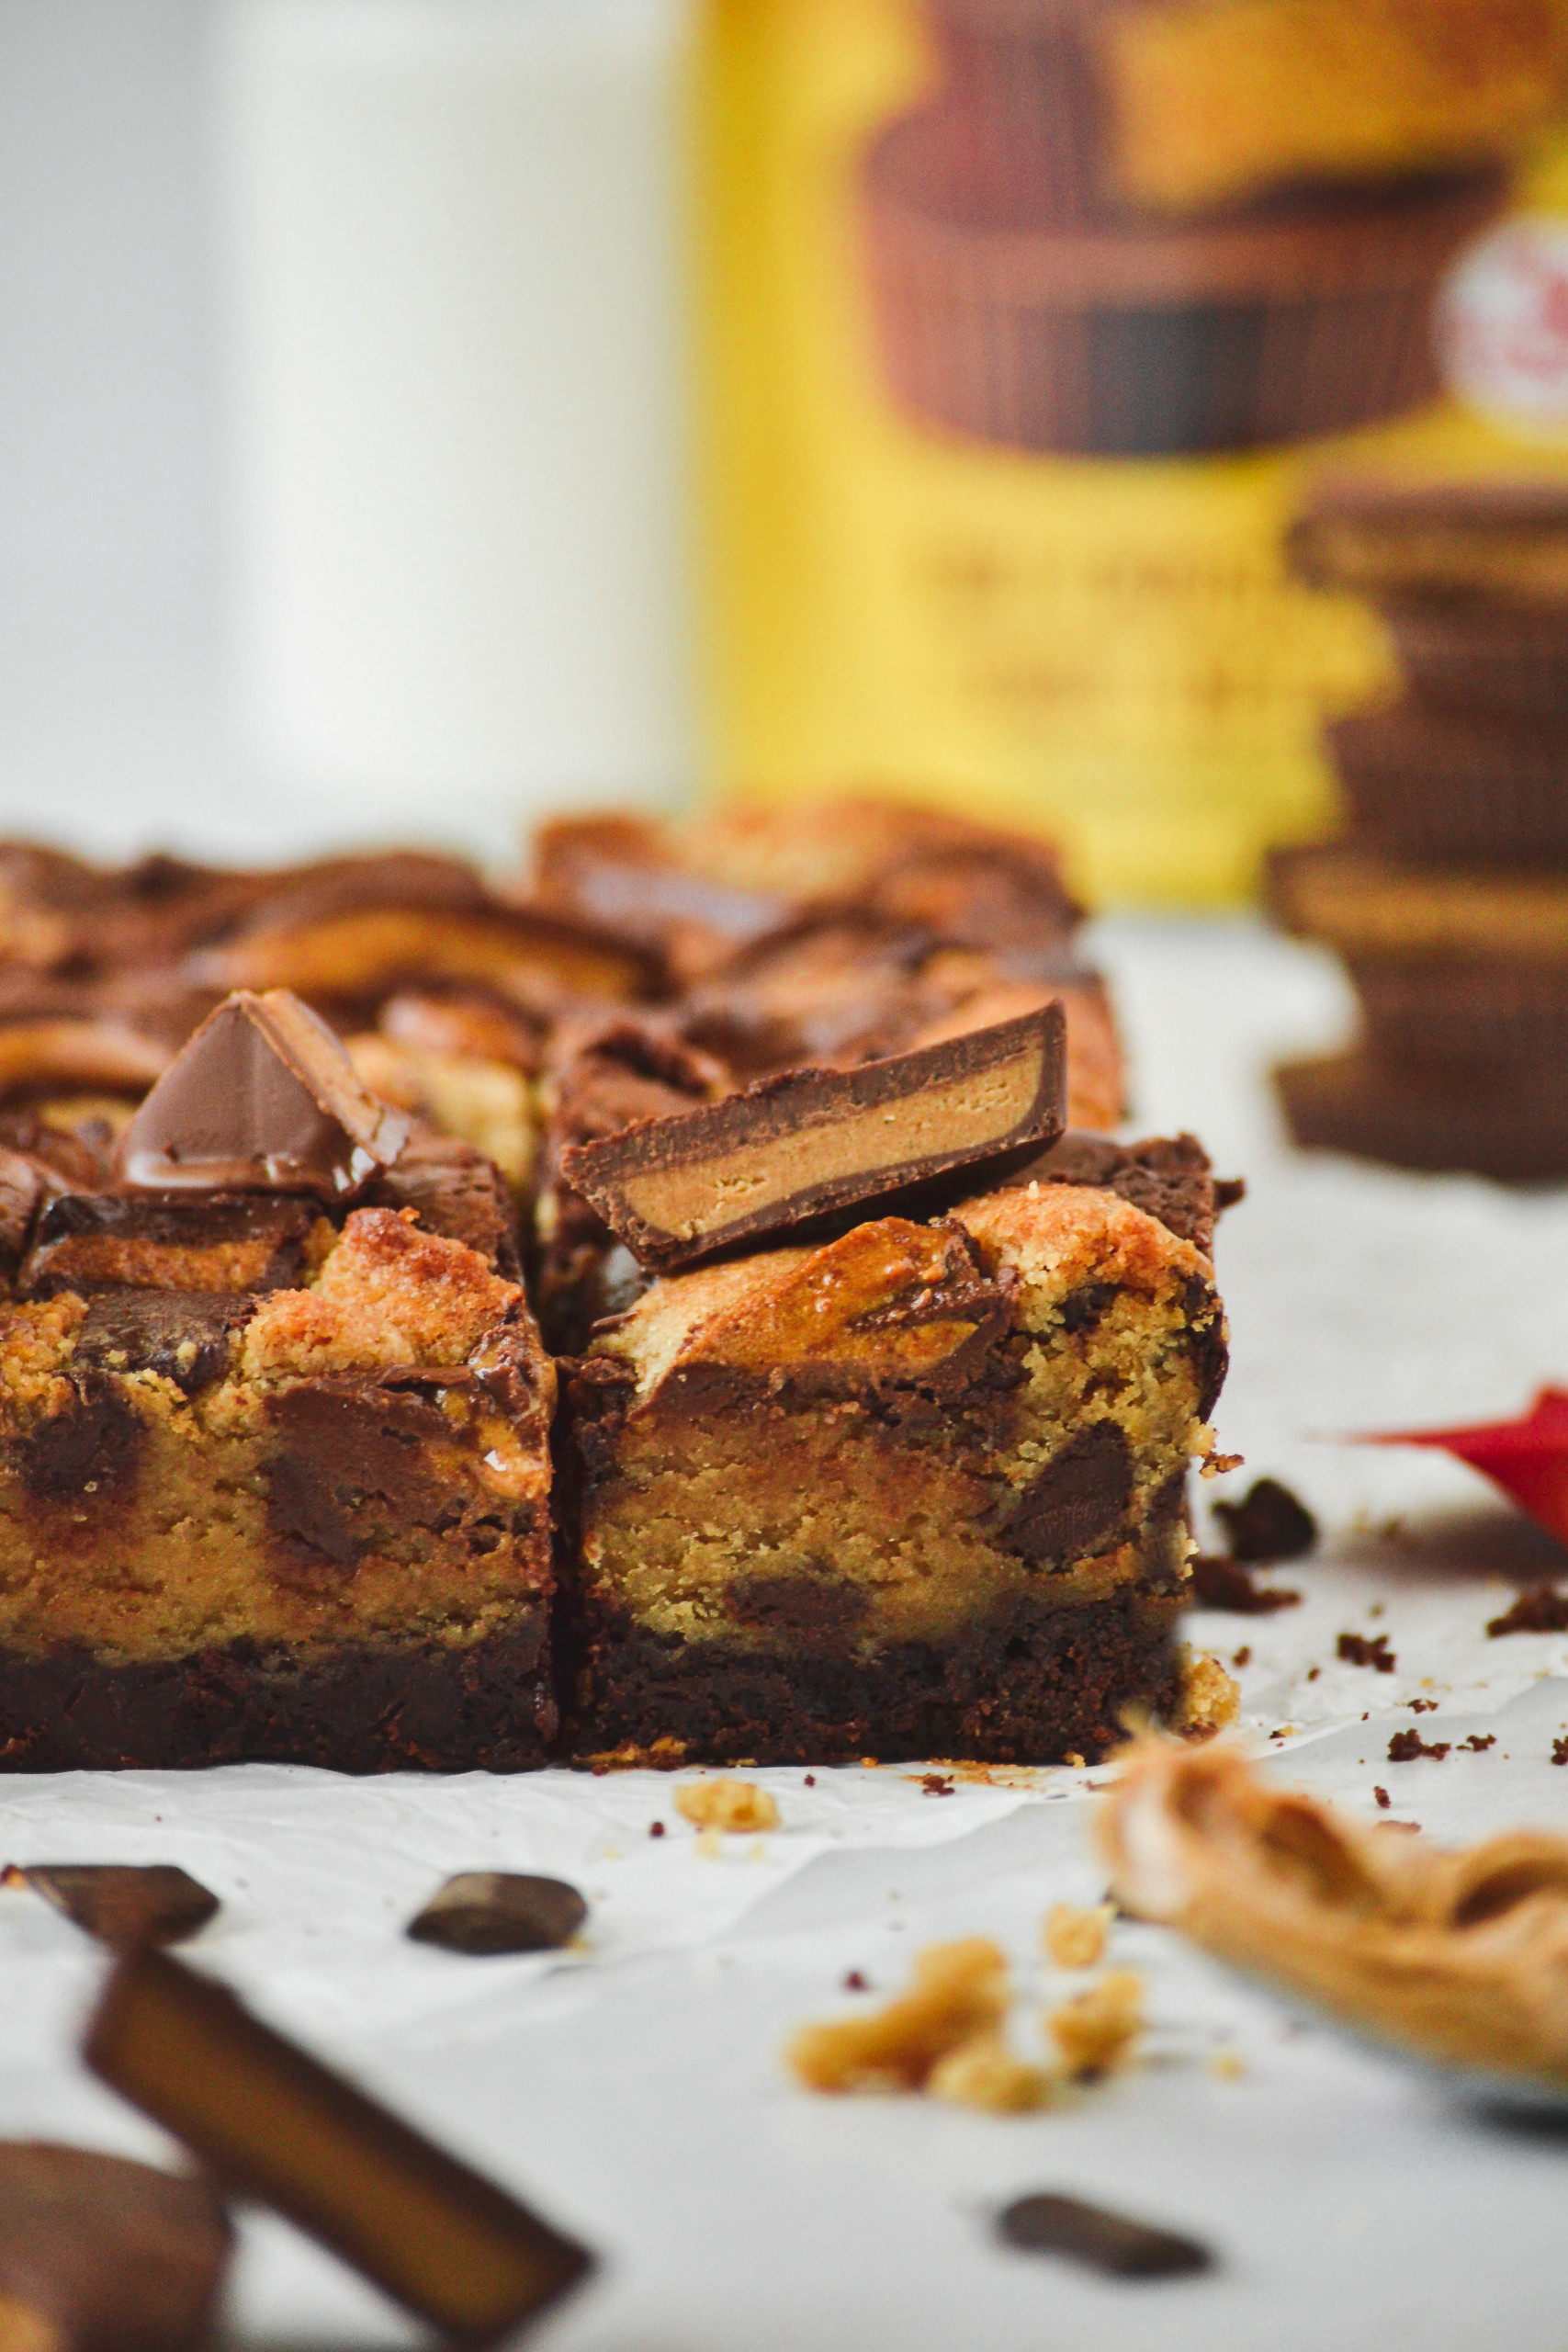
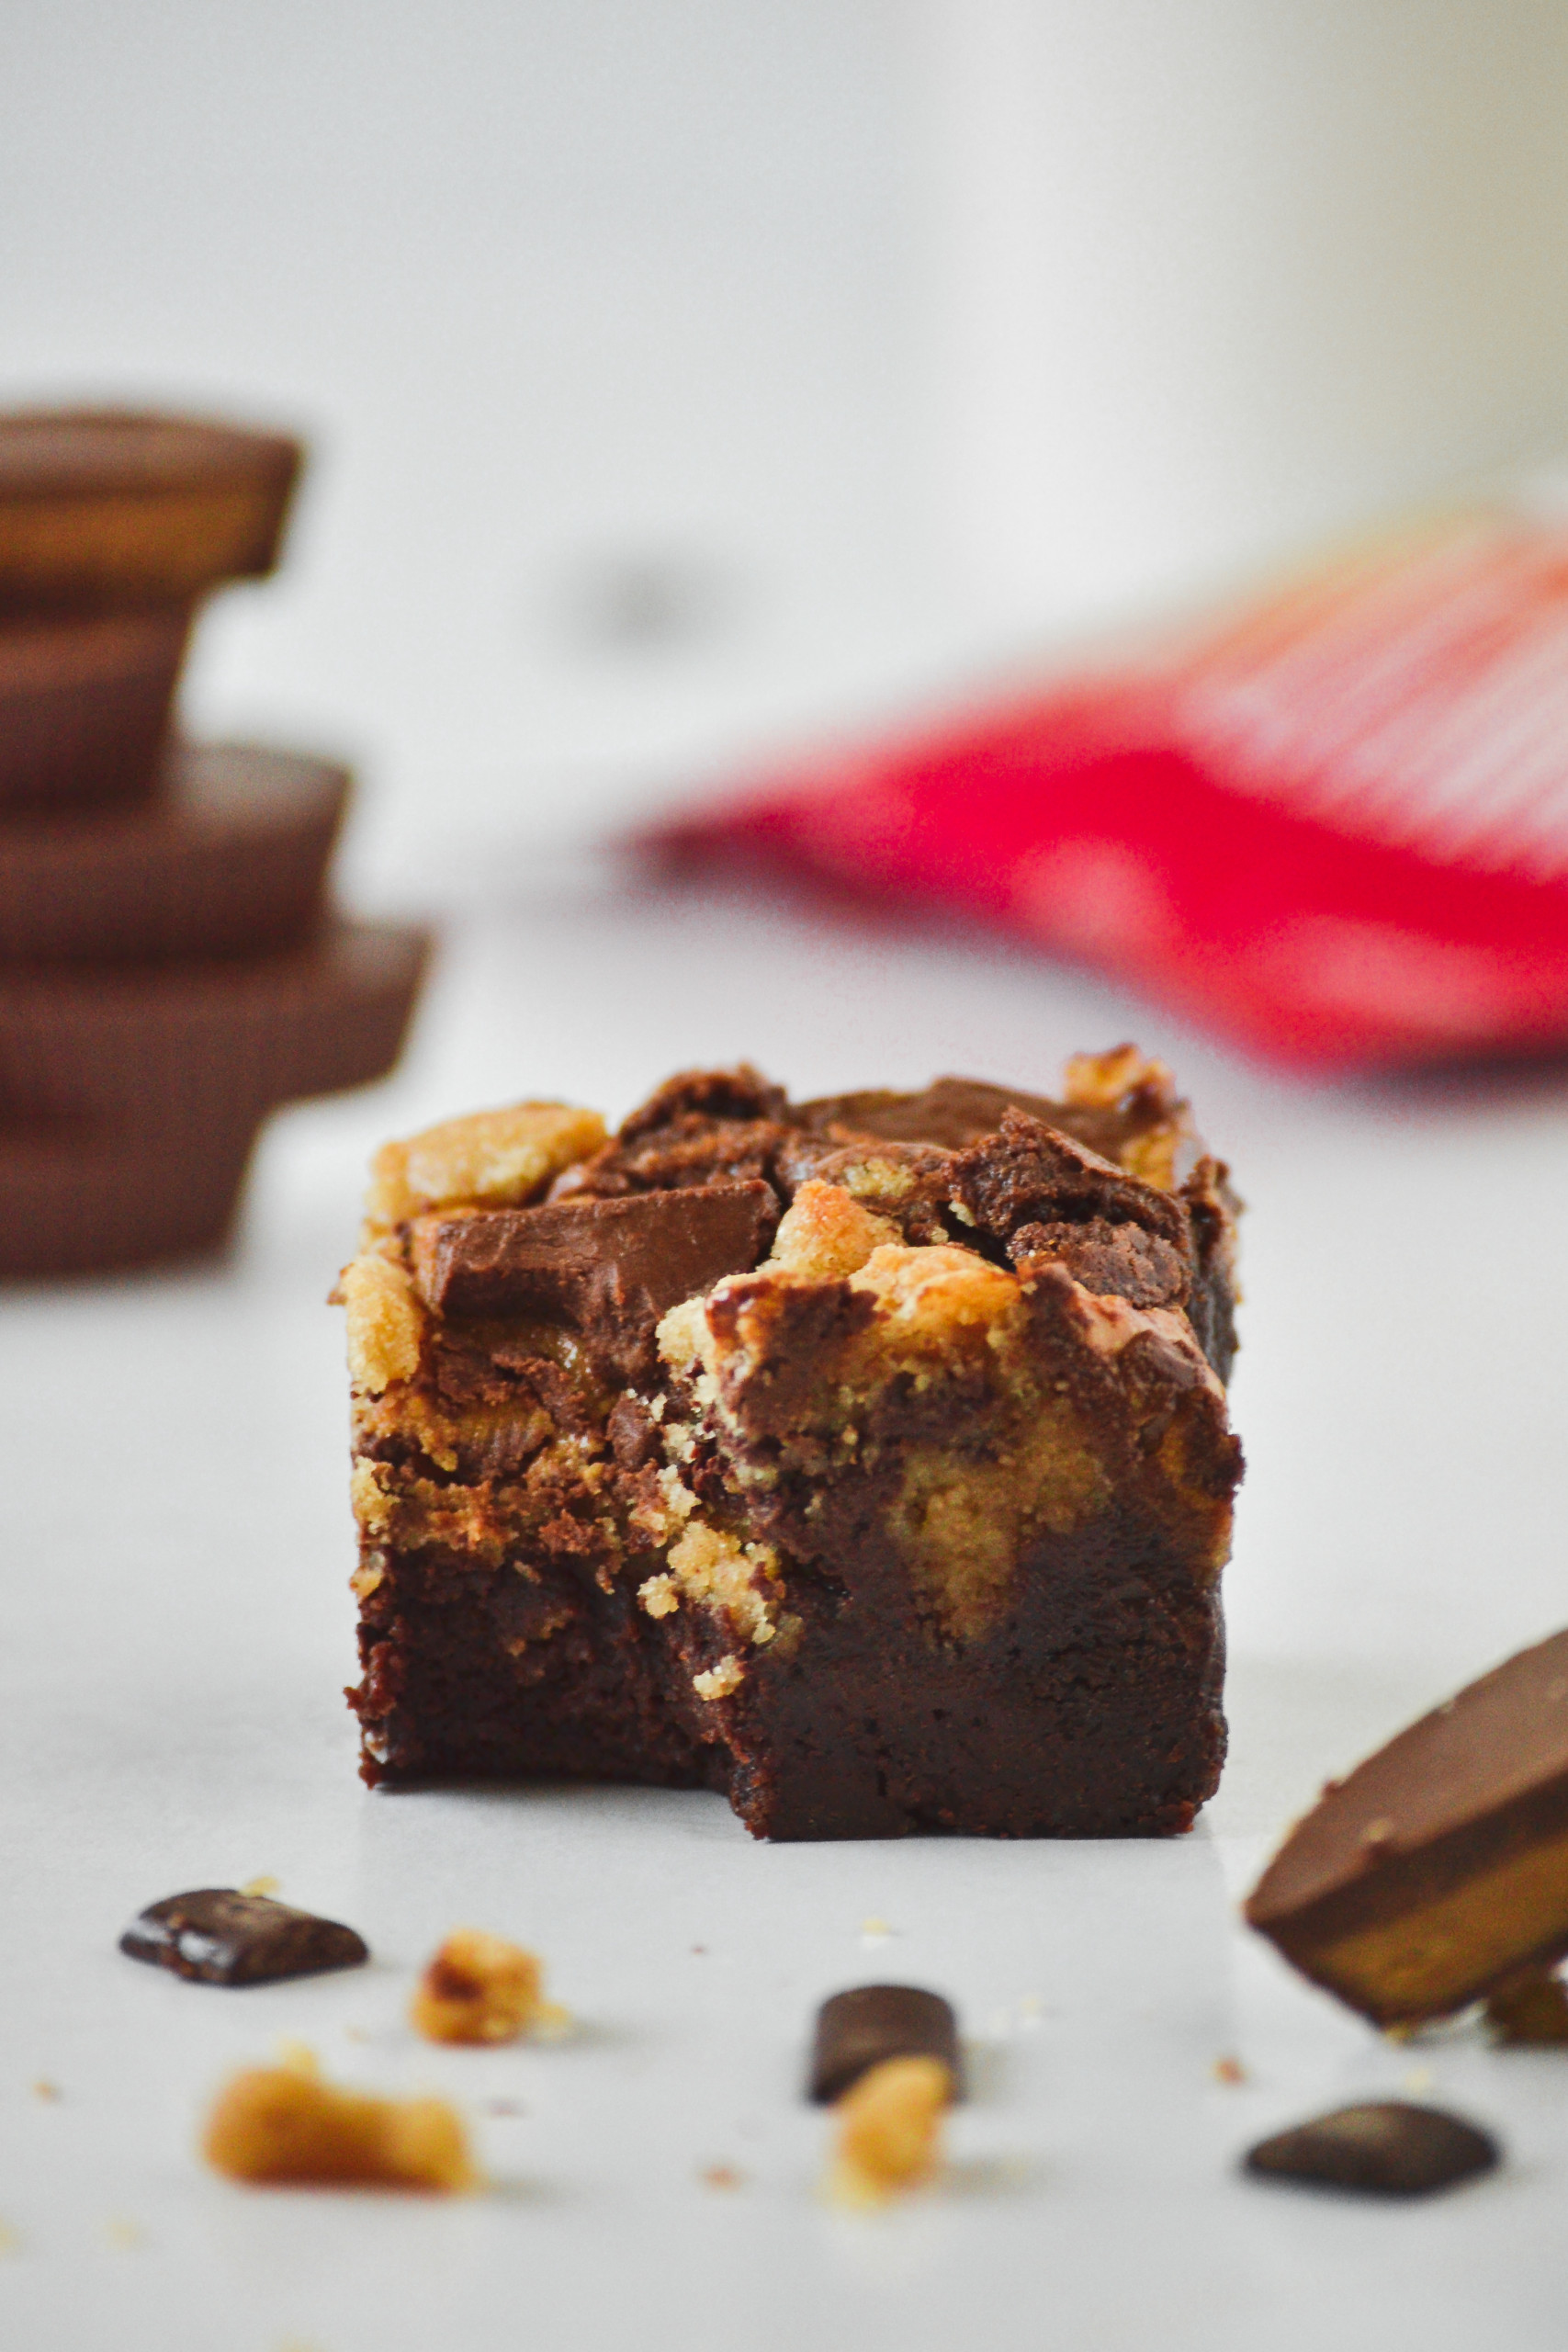
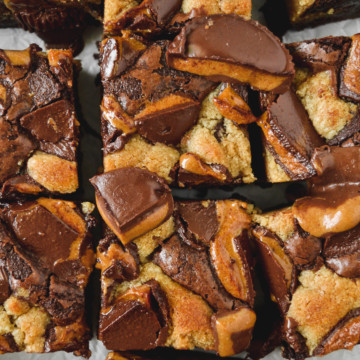
These peanut butter cup brookies feature a rich and fudgy brownie combined with a chewy gooey cookie, with layers of creamy peanut butt er swirled in and topped with decadent chocolate peanut butter cups! All in one bite!
WHY YOU WILL LOVE THESE BROOKIES
- You will never have to choose between a brownie or a cookie again!
- This one dessert combines all of the best features from three decadent desserts.
- Short on time? Don't worry! These brookies take less than 30 minutes to bake!
KEY INGREDIENTS AND SUBSTITUTIONS
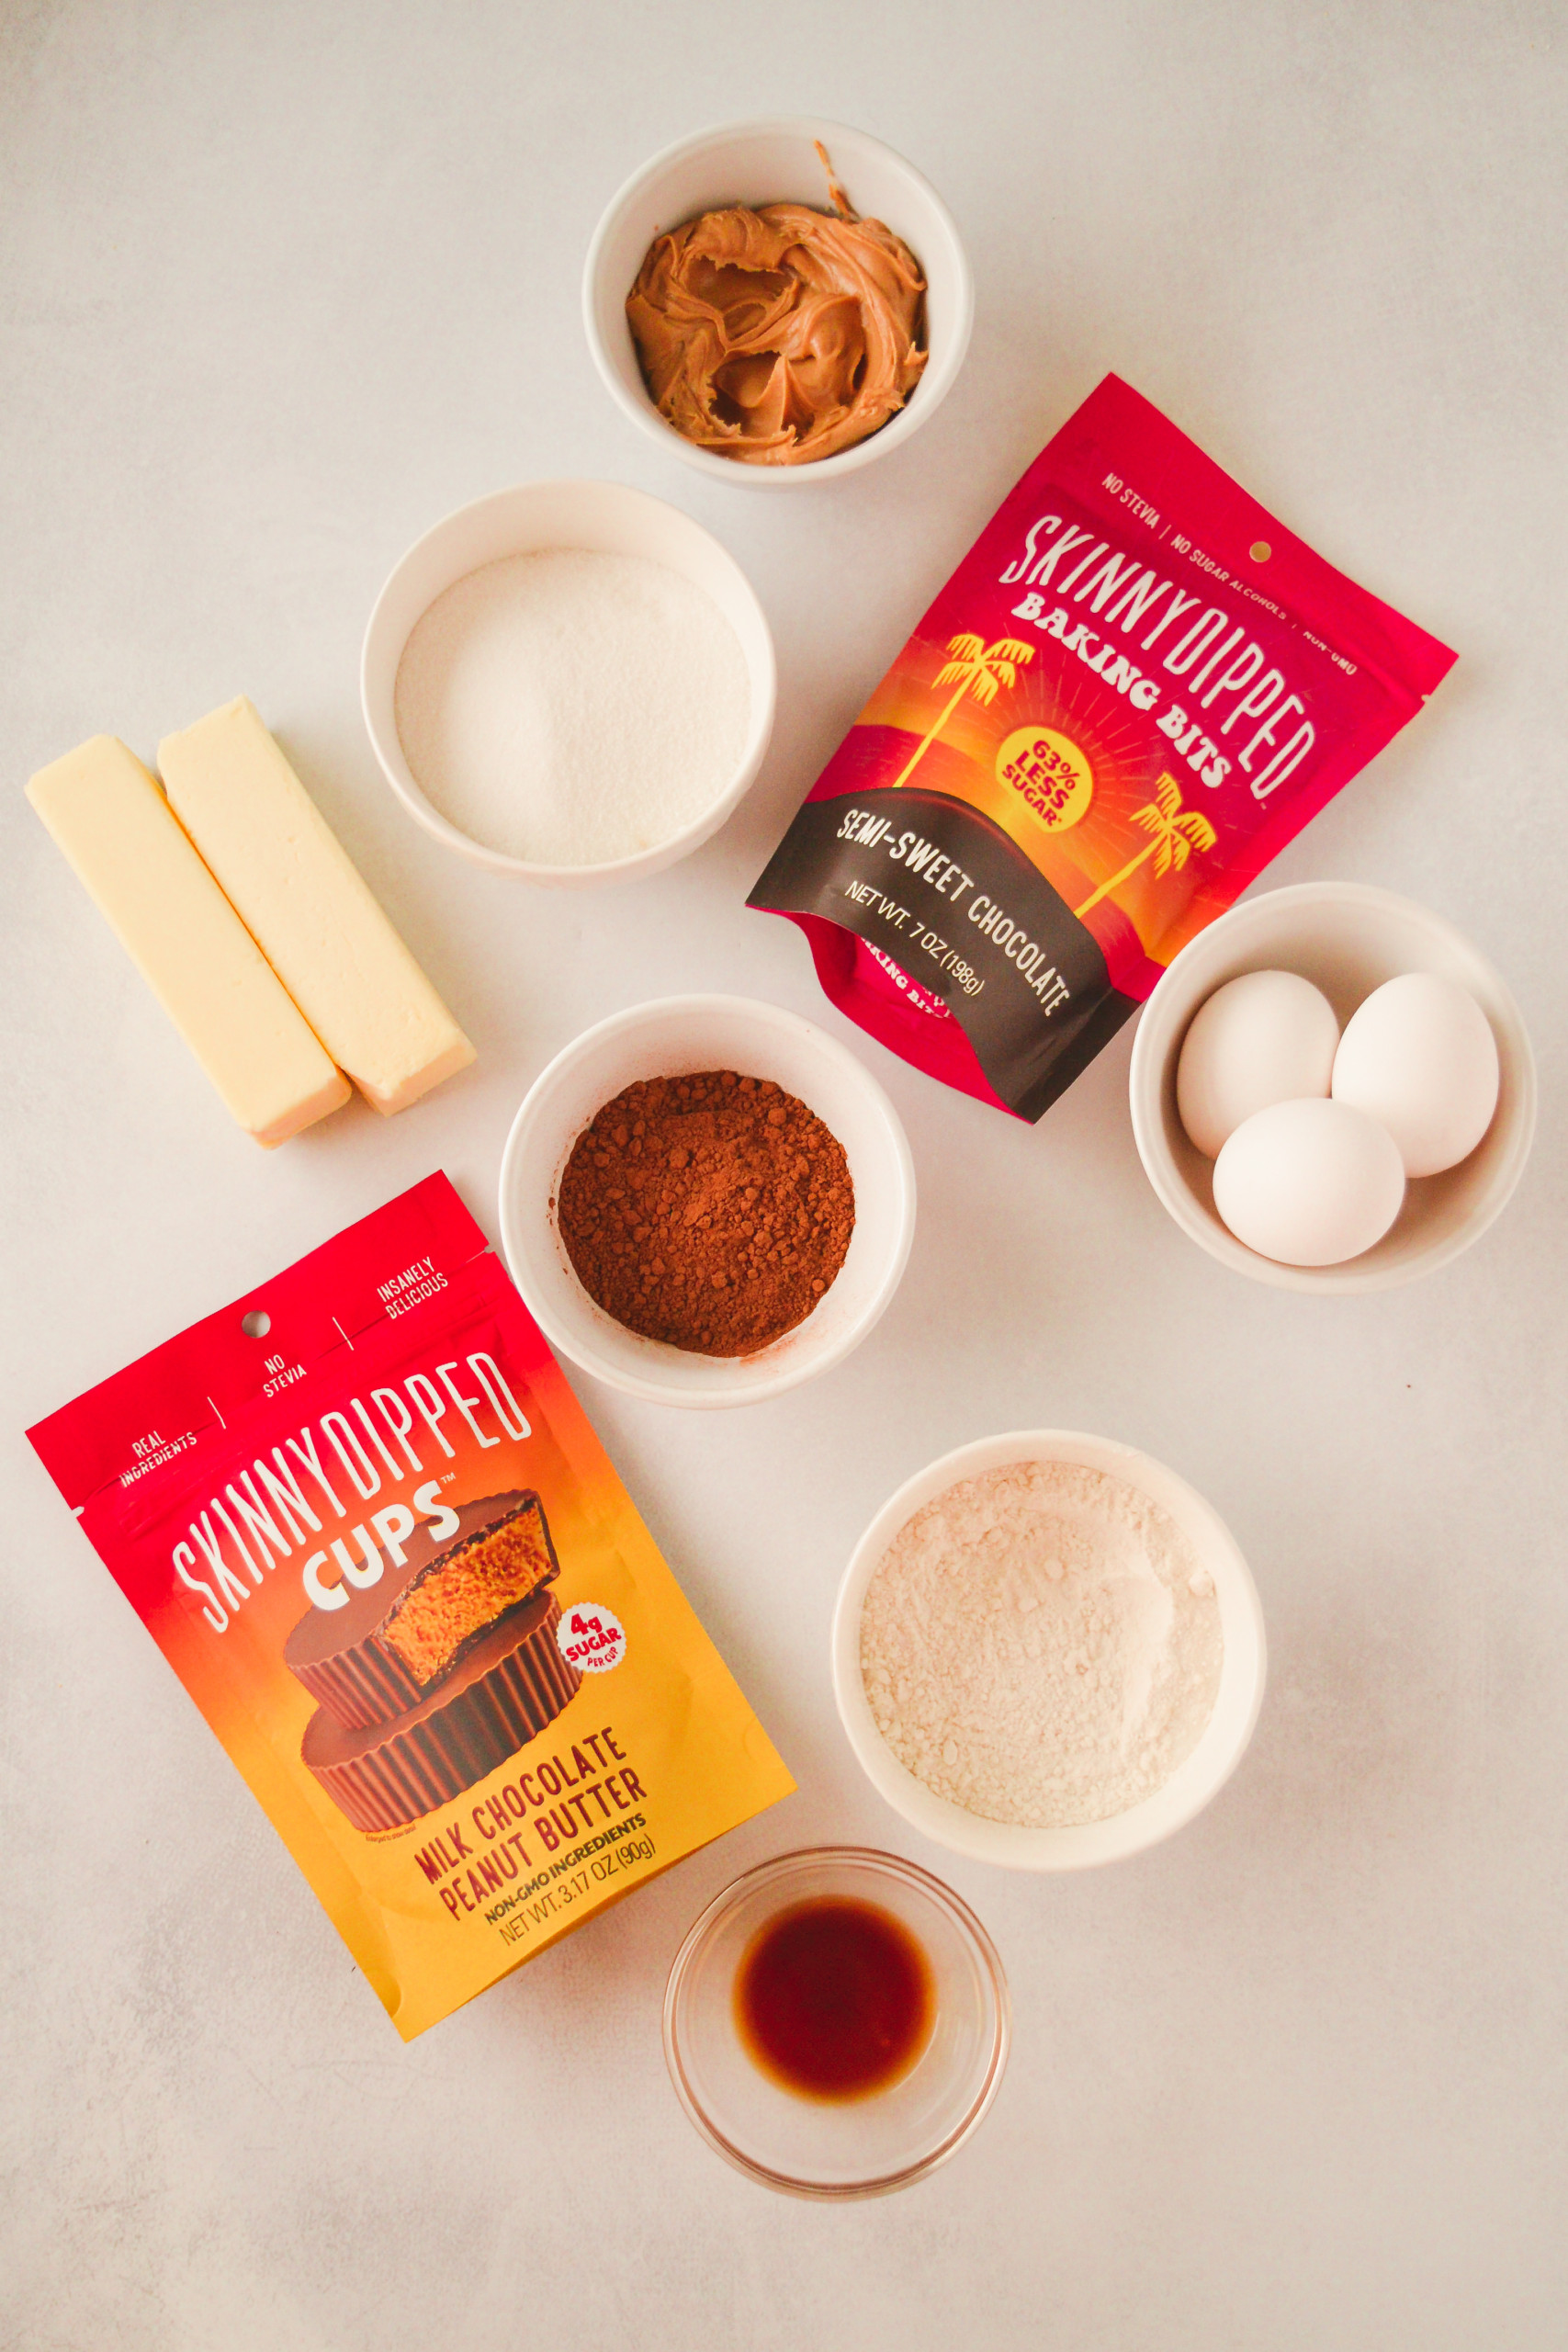
- SALTED BUTTER. I like to use salted butter over regular because that extra layer of salt helps balance out all the sweetness. But if unsalted butter is all you have then that will work too.
- CHOCOLATE CHIPS. Chocolate is everywhere in this recipe! I use melted chocolate in the brownies and chocolate chips mixed into the cookies. I used SkinnyDipped Baking Bits because they have less sugar and taste delicious but you can use any brand you desire.
- COCOA POWDER. I like to replace a significant amount of my flour with cocoa powder when making my brownies, in order to get a super rich and moist brownie!
- BROWN SUGAR. I use mostly brown sugar in my cookies. Brown sugar adds that delicious molasses flavor and helps to get a chewy cookie texture.
- PEANUT BUTTER. I add some peanut butter to my cookie dough to enhance the flavor of the peanut butter cups! But if you do not have peanut butter, then feel free to leave it out.
- PEANUT BUTTER CUPS. Top your brookies with peanut butter cups to make them even better! I use SkinnyDipped because they have less sugar and taste delicious but you can use any brand that you desire. Feel free to get a little creative and try out any of your favorite candy bars on top!
STEP BY STEP INSTRUCTIONS
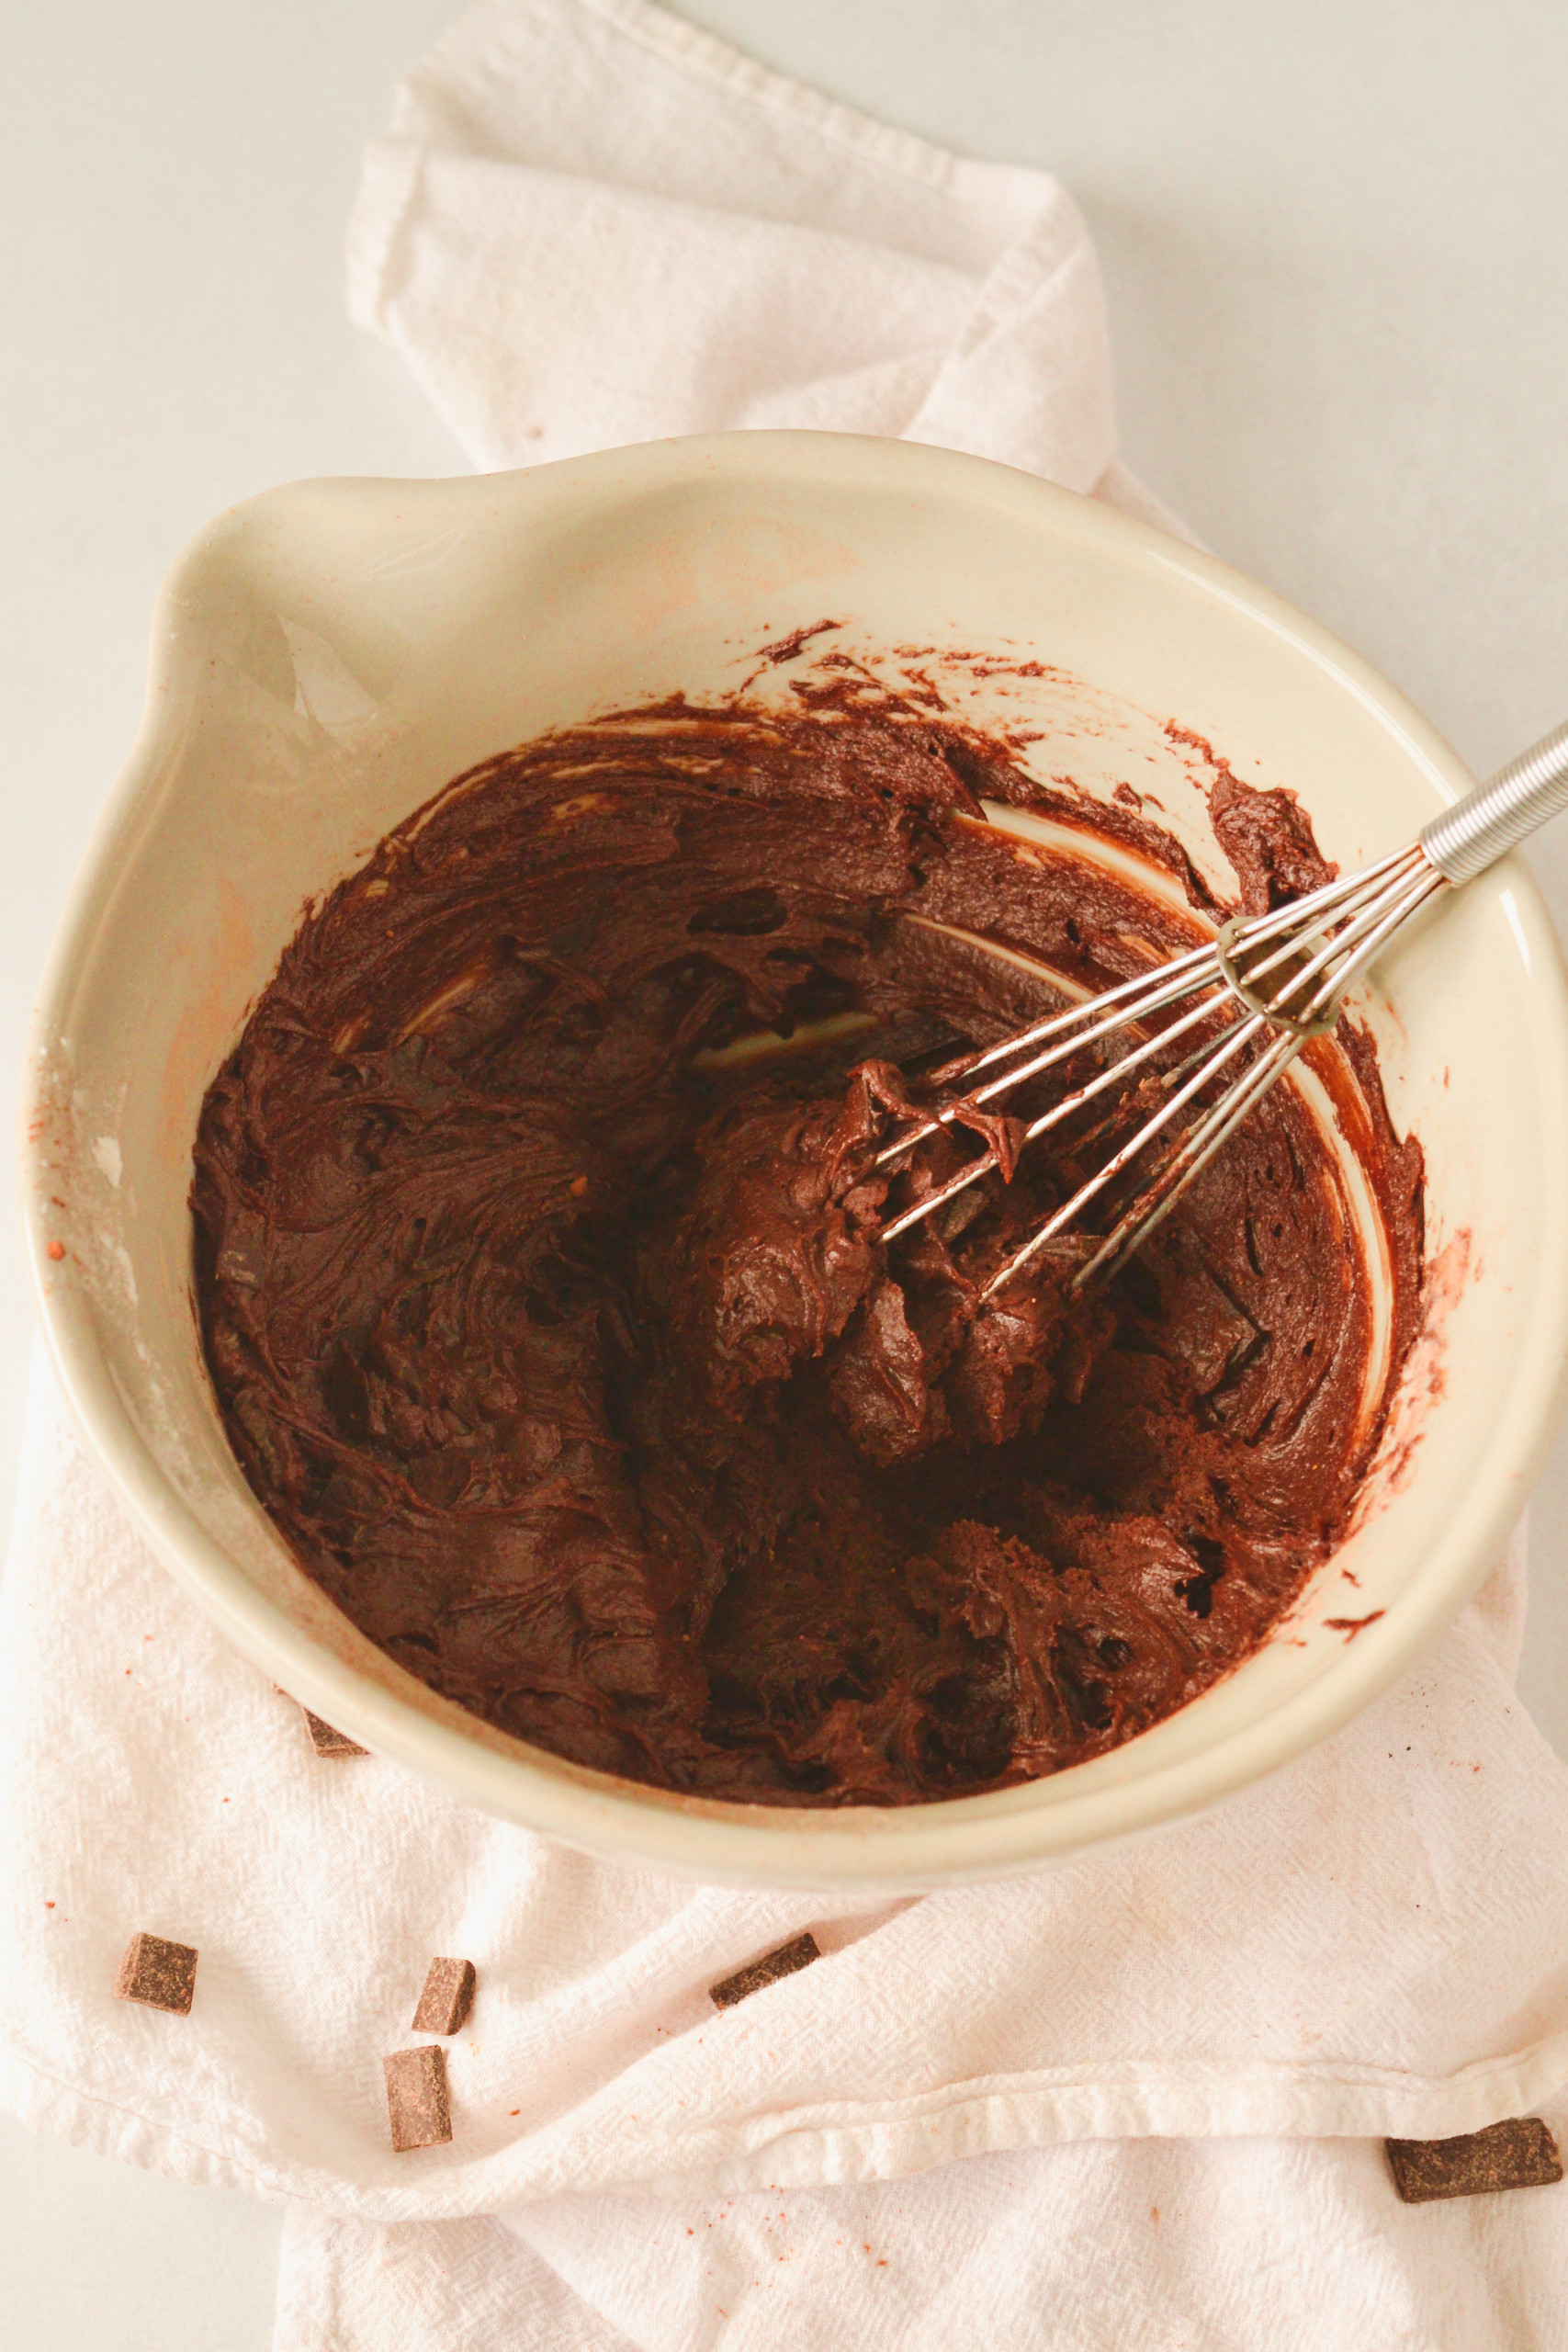
Fudgy Brownies
- In a double boiler add your ¾ cup chocolate chips and butter and mix until melted. Take off heat and set aside.
- In a large bowl combine your sugar, eggs, vanilla and mix until combined. Slowly add your chocolate mixture while continuously mixing. Then add your flour, cocoa powder and mix until combined. Add your additional ⅓ cup chocolate chips and fold in until combined.
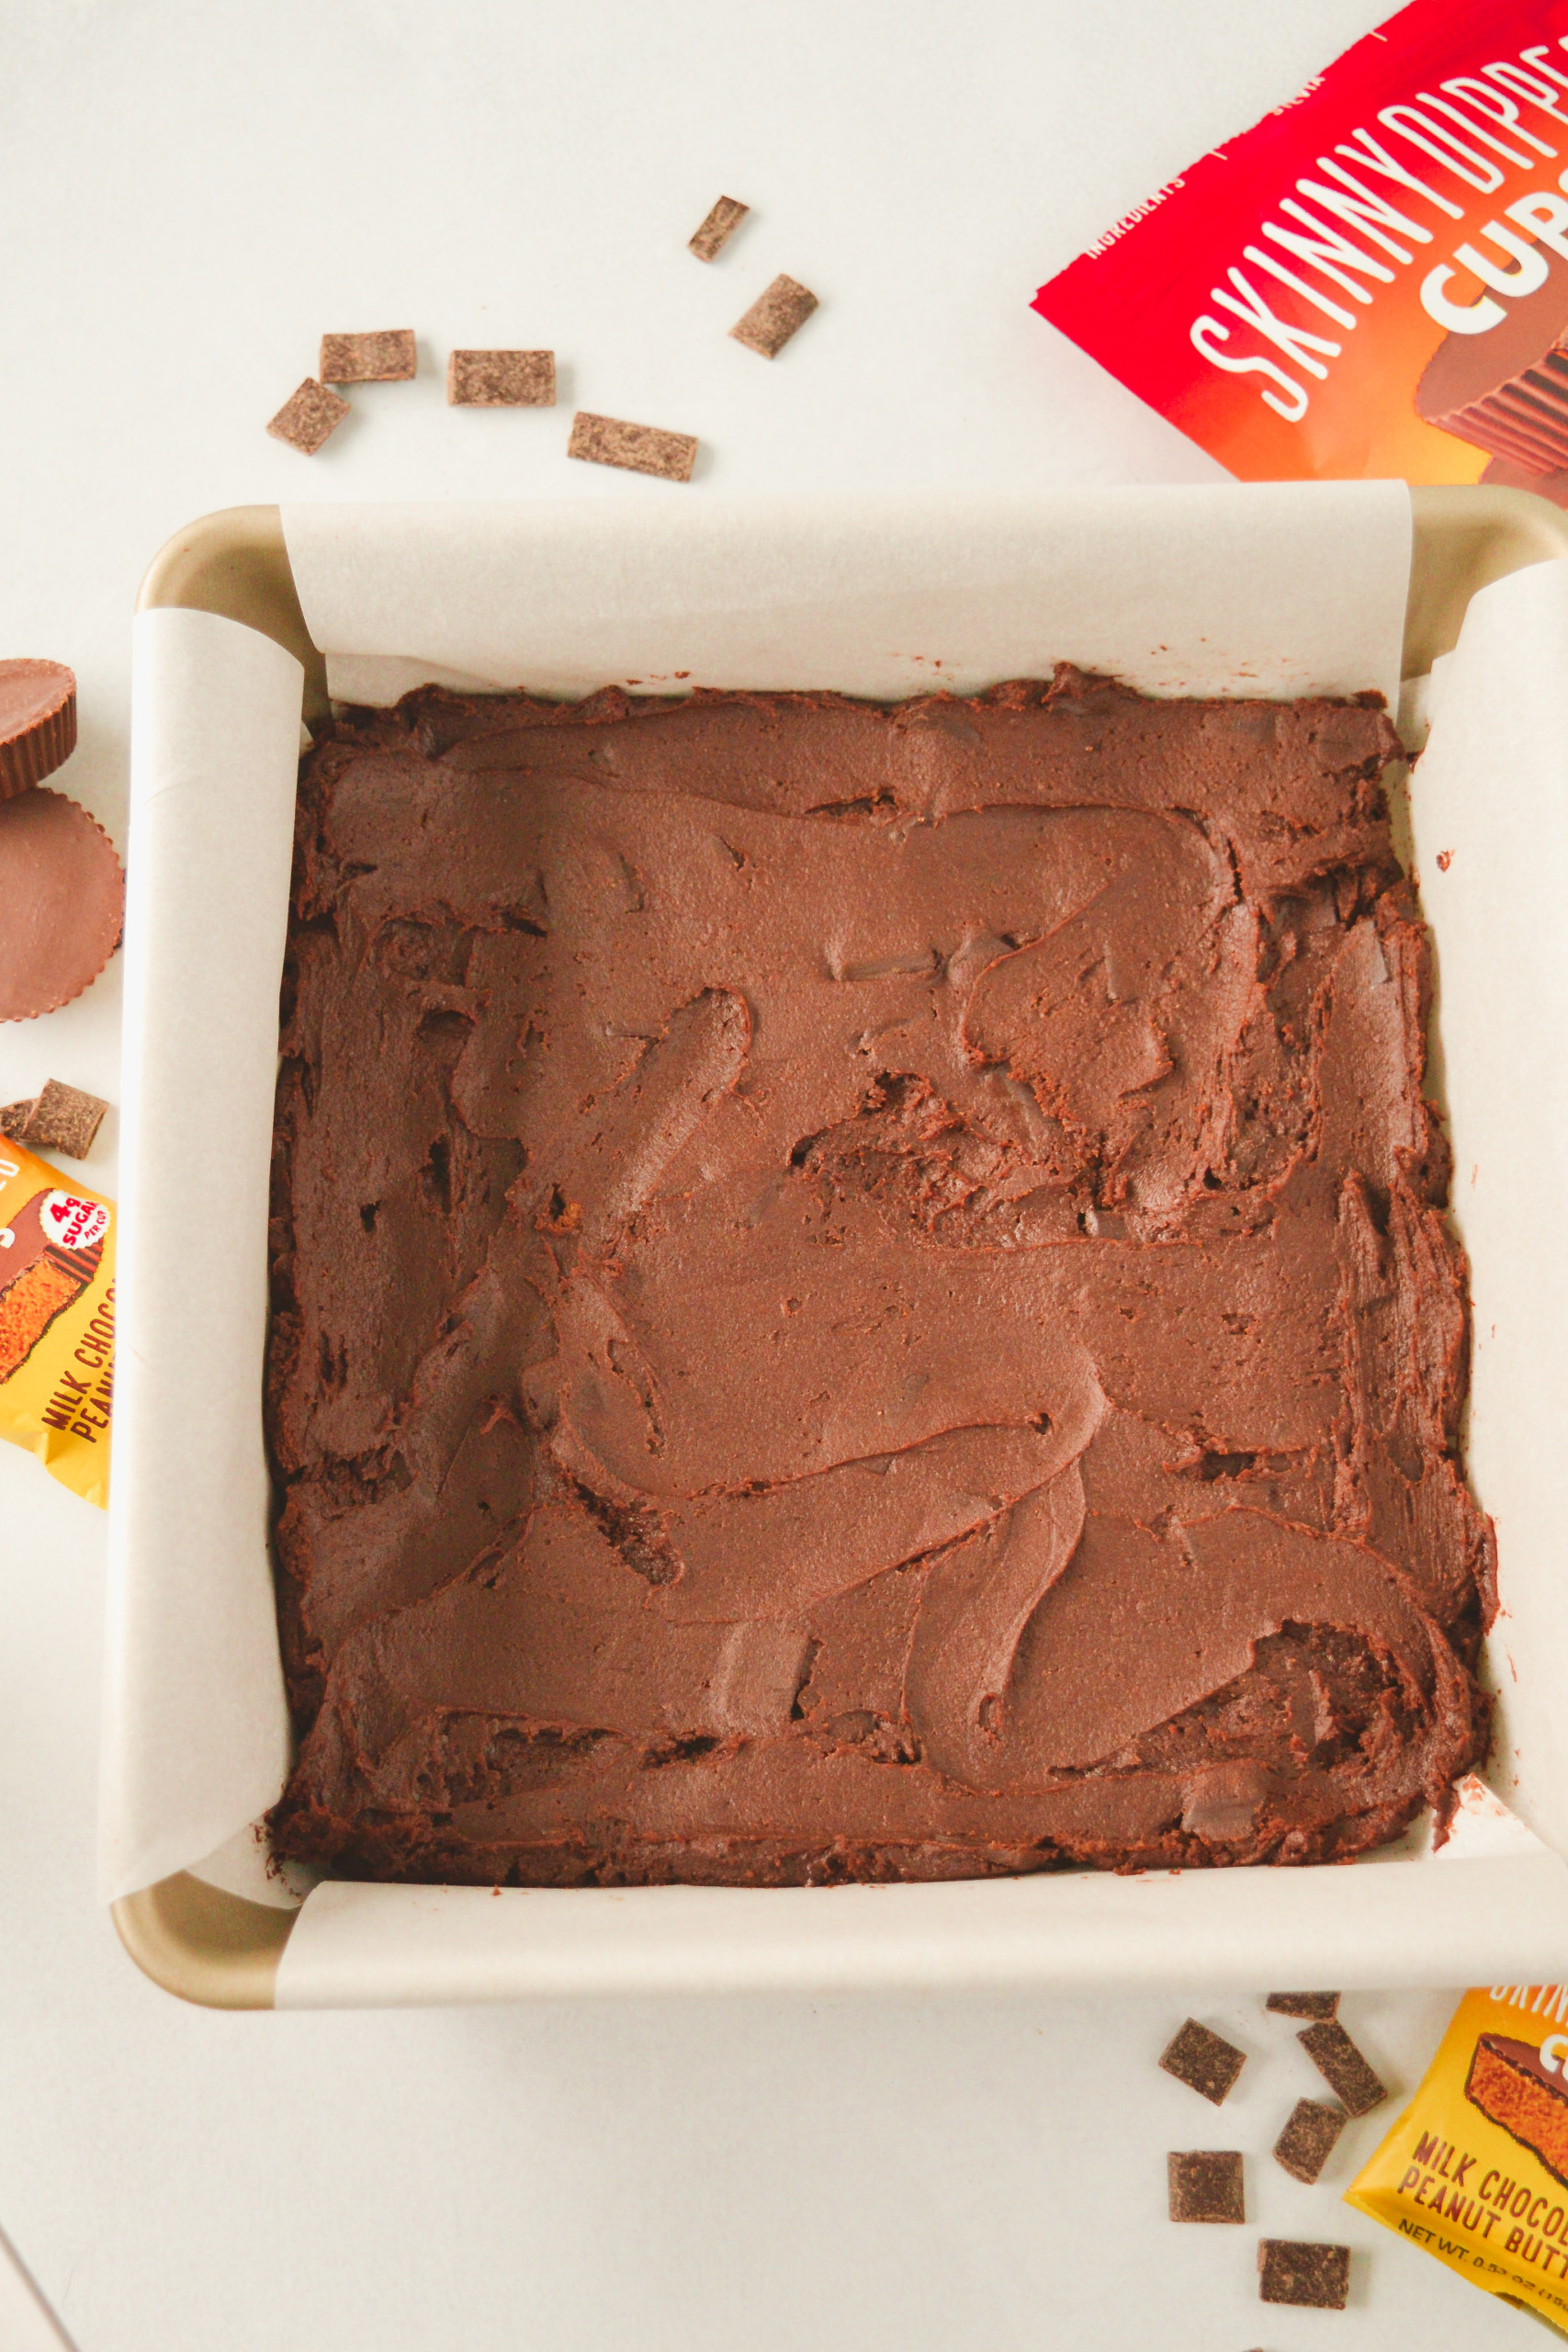
- Line a 9”x9” baking dish with parchment paper allowing some to hang over the side for easy removal.
- Pour your brownie batter into your pan and set aside.
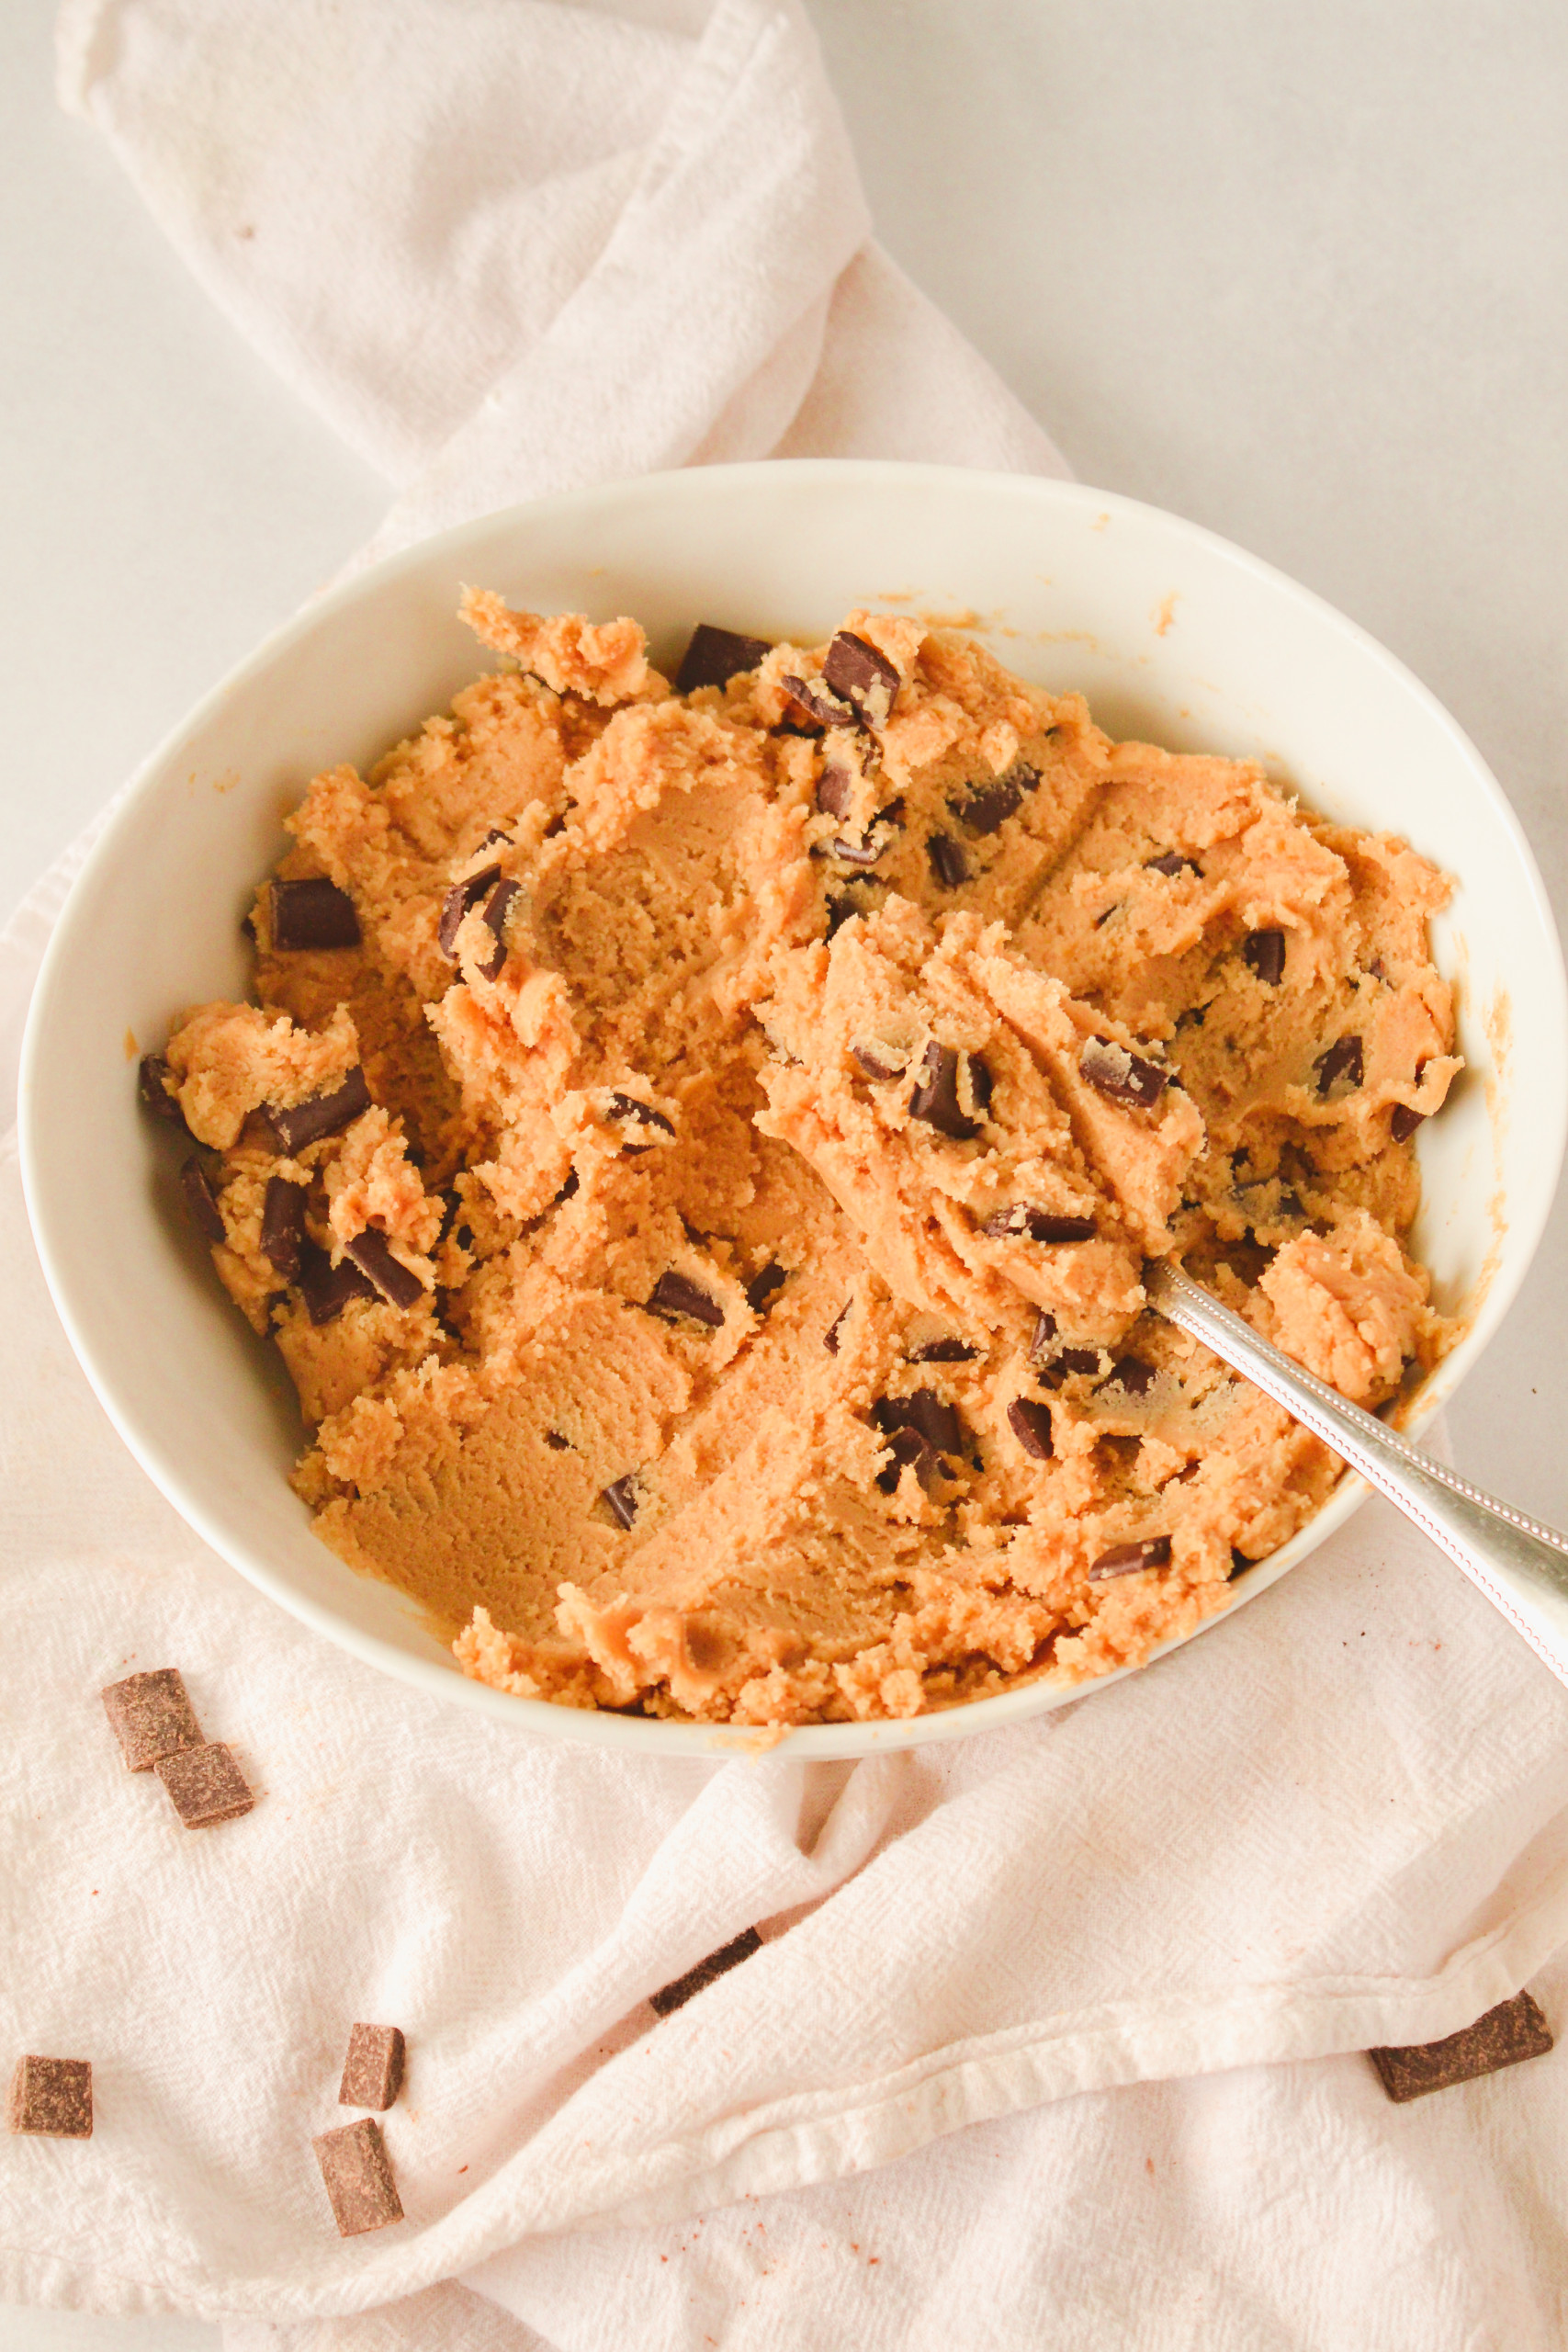
Peanut Butter Cookie Dough
- In the bowl of a stand mixer, beat your butter until soft and airy. Add your sugar and brown sugar and beat until combined. Add your egg and vanilla and beat until combined. In the same bowl add your flour, baking powder, baking soda, and salt. Mix until combined. Add your peanut butter and chocolate chips and mix until combined.
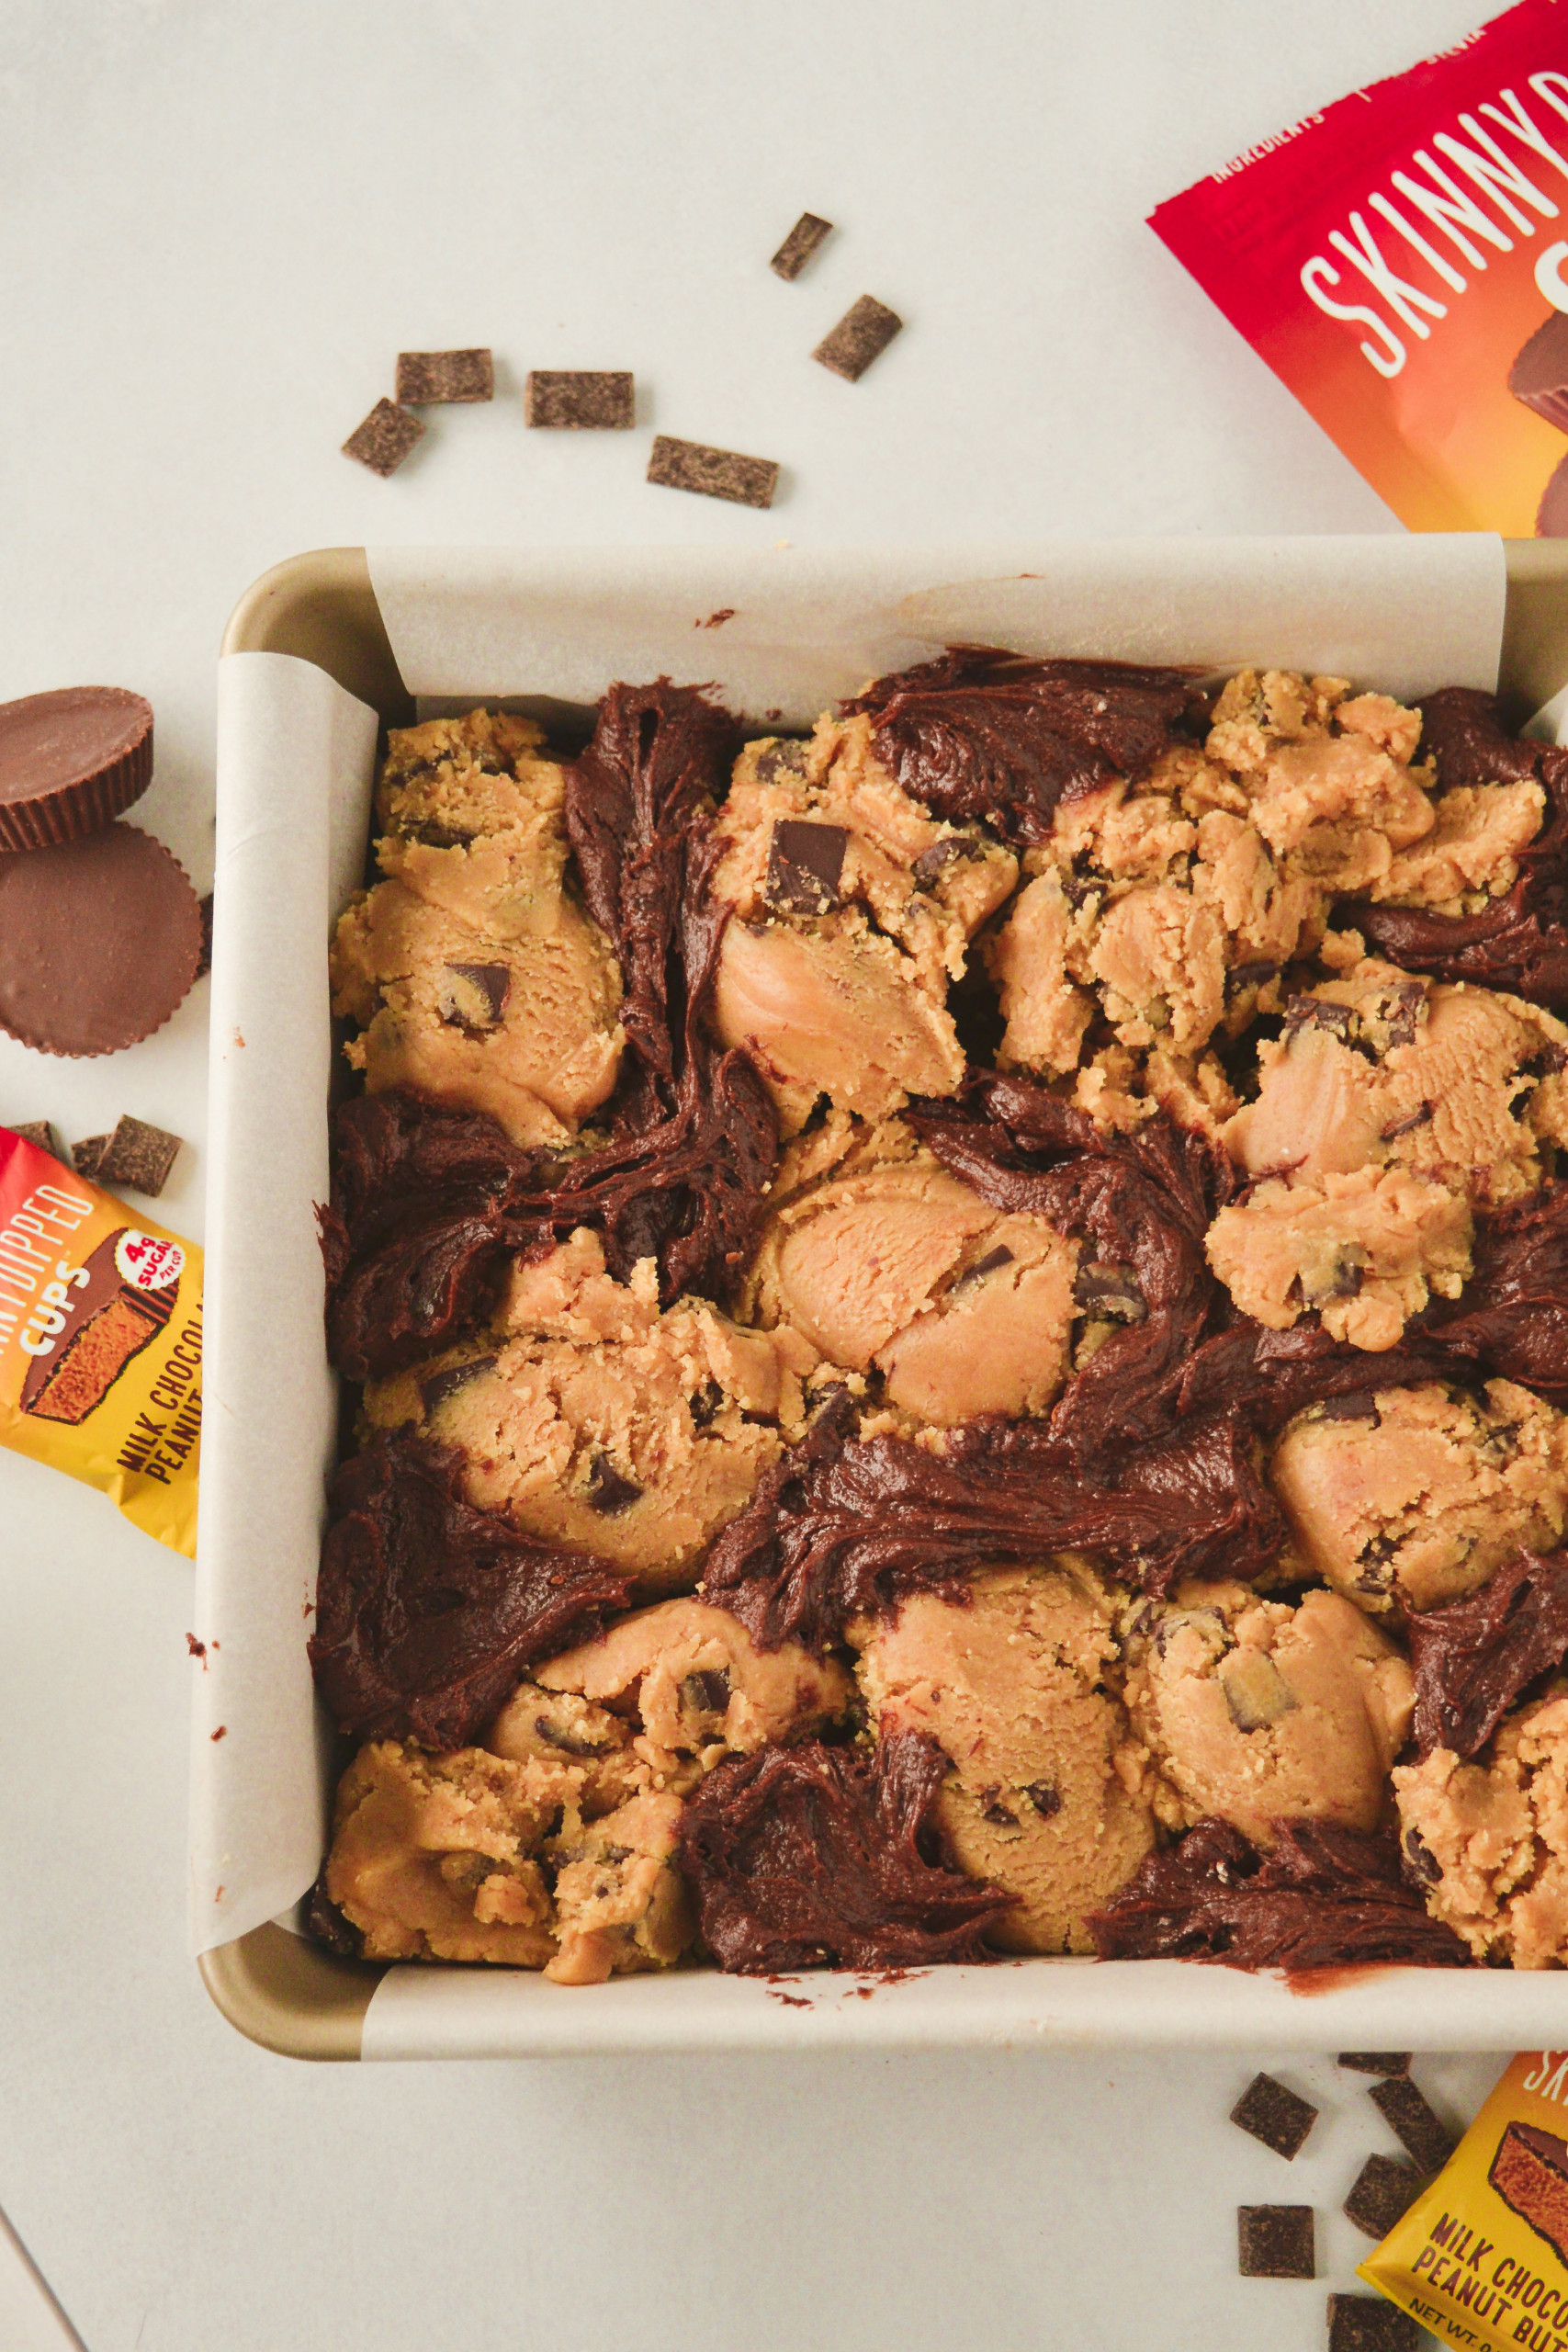
- Scoop out your cookie dough and layer it on top of your brownie batter until all of your dough is on top.
- Once the peanut butter cookie dough is on top of the brownie batter, slightly press the cookie dough into the brownie batter so that the brownie batter rises and fills in the cracks.
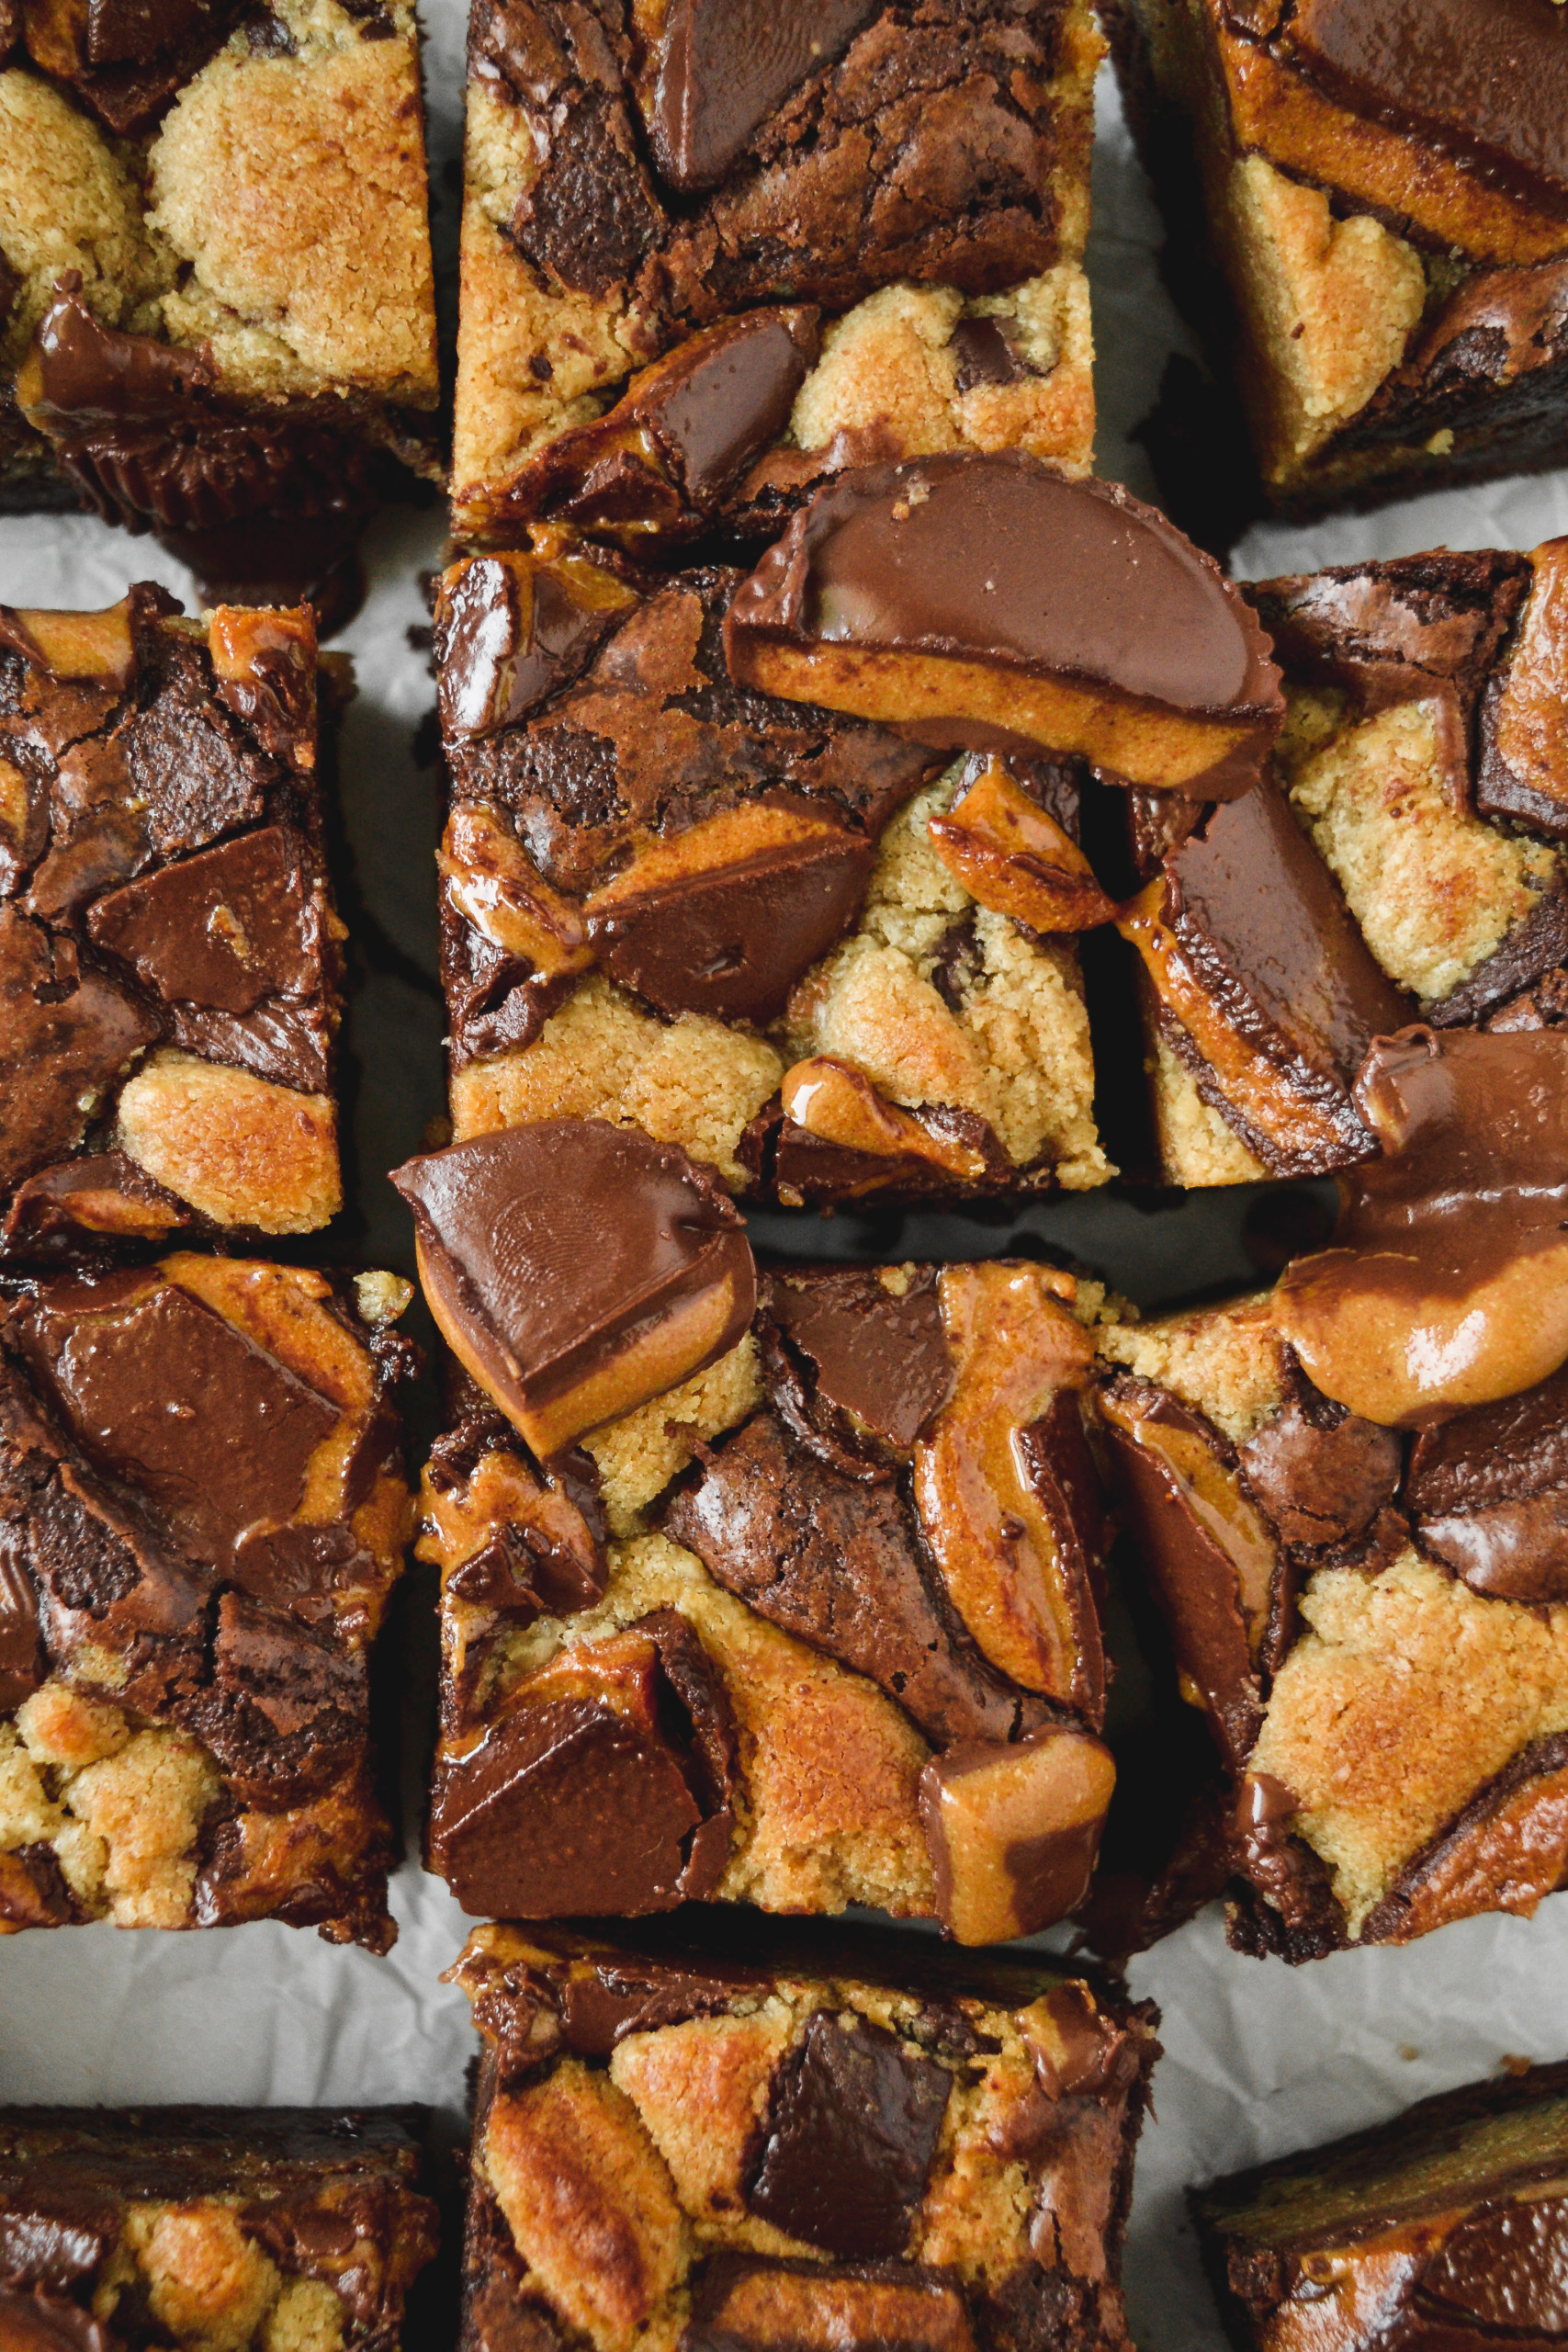
- Open up your peanut butter cups and cut into quarters. Then place/press them into your cookie dough.
- Bake at 350 degrees for 27 minutes.
- Take out, let cool and slice into 16 pieces. Enjoy!
EXPERT TIPS
- For your brownie batter, when adding your butter mixture to your egg mixture, make sure you are constantly stirring, otherwise you may cook your eggs.
- When you line your pan with parchment paper, make sure to leave the paper hanging over the edges to help with easy removal.
- If you forget to soften your butter, place your stick of butter in the microwave for 5 seconds. Then repeat for the remaining three sides, making sure to flip your stick each time. Once done, your stick should be perfectly soft throughout!
FAQ
Can I add a different kind of candy on top of my brookies?
Yes! This recipe has been developed and tested for peanut butter cups, so a different candy will possibly have a different outcome that I am not sure of but feel free to try it out!
Can I make these ahead of time?
Yes! Make both batters ahead of time and place them in the baking dish. Wrap with plastic wrap tightly and store in the fridge for up to 3 days before baking!
Can I bake this in a different size baking dish?
I wouldn't recommend it. I have developed this recipe for a 9x9 inch baking dish so if you use a different size pan it will alter baking temperatures and times which I have not tested, therefore it may not come out right.
FREEZING AND STORING
These brookies should be stored wrapped in plastic wrap and placed in an air tight container for up to 3 days. You can freeze them like this for up to 3 months.
Lastly, if you try out these Peanut Butter Cup Brookies, be sure to leave a comment/rating on how it turned out. I love hearing from you guys and will try my best to reply to every comment! And don’t forget to tag me on Instagram!
CRAVING MORE BROWNIES OR COOKIES?
Crushed Oreo Chocolate Chip Cookies
Peanut Butter Cup Brookies
Ingredients
Fudgy Brownie
- ¾ cup salted butter
- ¾ cup chocolate chips I used SkinnyDipped but you can use any kind you desire
- 1 cup sugar
- ⅓ cup cocoa powder
- 2 teaspoon vanilla
- 1 teaspoon salt
- 3 eggs
- ⅓ cup flour
- ⅓ cup chocolate chips (mix in) I used SkinnyDipped but you can use any kind you desire
Peanut Butter Cookie Dough
- ½ cup salted butter (softened)
- ¼ cup sugar
- ½ cup brown sugar
- 1 teaspoon vanilla
- 1 egg
- ½ teaspoon salt
- ½ teaspoon baking powder
- ¼ teaspoon baking soda
- 1 ⅓ cup flour
- ½ cup peanut butter
- ¾ cup chocolate chips I used SkinnyDipped but you can use any kind you desire
Toppings
- 12 large peanut butter cups I used SkinnyDipped but you can use any kind you desire
Instructions
Fudgy Brownie
- In a double boiler add your ¾ cup chocolate chips and butter and mix until melted. Take off heat and set aside.
- In a large bowl combine your sugar, eggs, vanilla and mix until combined. Slowly add your chocolate mixture while continuously mixing. Then add your flour, cocoa powder and mix until combined. Add your additional ⅓ cup chocolate chips and fold in until combined.
- Line a 9”x9” baking dish with parchment paper, allowing some to hang over the side for easy removal.
- Pour your brownie batter into your pan and set aside.
Peanut Butter Cookie Dough
- In the bowl of a stand mixer, beat your butter until soft and airy. Add your sugar and brown sugar and beat until combined. Add your egg and vanilla and beat until combined. In the same bowl add your flour, baking powder, baking soda, and salt. Mix until combined. Add your peanut butter and chocolate chips and mix until combined.
- Scoop out your cookie dough and layer it on top of your brownie batter until all of your dough is on top.
- Once the peanut butter cookie dough is on top, slightly press the dough into the brownie batter so that the brownie batter rises and fills in the cracks.
- Open up all of your peanut butter cups and cut them into quarters. Then press them into your cookie dough.
- Bake at 350 degrees for 27 minutes.
- Take out and let cool. Slice into 16 pieces. Enjoy!
Leave a Reply